Thursday, November 10, 2011

Howto get network card vendor, device or kernel module from the /proc and/or /sys filesystem

Work in progress - place to keep notes to myself - may help someone else - cheat sheet kinda page ;)

1. How to get NIC/network card vendor information (scripted example)

for i in `ls -d /sys/class/net/eth*` do   ETH="`basename $i`"   echo -n "$ETH "   NICID="`cat /sys/class/net/$ETH/device/vendor|cut -c3-`"   grep "^$NICID" /usr/share/hwdata/pci.ids done
2. How to get the NIC/network card MAC address (simple example)
cat /sys/class/net/eth0/address
3. How to get the NIC/network kernel module and PCI device info (DETAILS). This can also derive the vendor and device info like above (simple example)
VENDOR="`cat /sys/class/net/eth0/device/modalias |cut -c6-13`" DEVICE="`cat /sys/class/net/eth0/device/modalias |cut -c15-22`" grep -i $VENDOR /lib/modules/`uname -r`/modules.alias | grep -i $DEVICE
OR generally
grep `cat /sys/class/net/eth0/device/modalias |cut -c-22` /lib/modules/`uname -r`/modules.alias
External important links for PCI or kernel module information for Linux:
http://www.pcidatabase.com/

4. How to find the WWN for a SAS end device (the arrary for example) card on RHEL 6, CentOS 6 or similar (simple example)
cat /sys/class/sas_device/*/sas_address
5. How to find the WWN for a SAS card on RHEL 6, CentOS 6 or similar (simple example)
cat /sys/class/sas_phy/*/sas_address

OpenGTS client connection test with gps2opengts-free

WORK IN PROGRESS!!!

Just recently started playing setting up a GPS tracking server. Here is a follow up client connection on my Android phone with the free version of  gps2opengts. Here are some (incomplete) notes so far.

I hope you can at least find and install the gps2opengts-free on your own. I will skip that ;)
I will leave it up to you to figure out how to tunnel/port forward through your firewall as required.

OpenGTS server config change for "GPRMC" type of connections based on info from HERE.
Edit /var/lib/tomcat6/webapps/track/WEB-INF/webapp.conf and uncomment the the next 2 lines from the "# --- GPRMC properties" section:

gprmc.parm.account=acct
gprmc.parm.device=dev

Rebuild and deploy the tomcat container as noted from my server setup page:
ant all
ant track.deploy
ant gprmc.deploy

(re)Start tomcat:
service tomcat6 restart

OpenGTS web based vehicle setup for gps2opengts-free (should also work with GPS2OpenGTS_Pro):
1. Log into your OpenGTS server as a user "demo" (just playing with the demo install at this point!). 
1. From the "Main Menu" -> "Administration" tab -> "Vehicle Admin" -> create a new "Vehicle ID" of "test01".
2. From the "View/Edit Vehicle Information" section -> select the new vehicle and then "Edit" button.
3. "Unique ID" is required and will be the "test01" that is the only option for the free client gps2opengts-free. Otherwise add info to as many fields as you know/want. Make sure this vehicle is also "Active" = "Yes" and hit the "Change" button to save.

gps2opengts-free android app client setup:
I hope to document this tonight...

Note: As part of the frustration of initial install, I needed a little help from tcpdump to help figure out what was/was not happening. Again, my lack of tomcat knowledge was the reason for my issues:
tcpdump port 8080 -vvvvvv and not host THE_HOST_YOU_MAY_HAVE_SSHd_FROM

Note: I was hoping to find a handy to use wget to make local connection attempts. The assumption is that you are connecting via the "demo" default account like:
wget --post-data='/gprmc/Data?acct=demo&dev=test01&gprmc=$GPRMC,172413,A,3848.8028,N,08957.3521,W,0,000.0,171111,,*16' http://localhost:8080
But I have been unable to get this kinda thing to work. Wireshark shows the wget doing an http/1.0 post that is different that the gps2opengts_free http/1.1 post :(

Log information can be gotten from the /var/log/tomcat6/catalina.out  $GTS_HOME/logs/w-gprmc.log $GTS_HOME/logs/TrackWar.log or any other file in the $GTS_HOME/log/ directory.

Friday, October 28, 2011

CentOS 6.0 OpenGTS 2.3.8 install and demo setup howto

This is the quick install and setup for OpenGTS and CentOS 6.0.  OpenGTS is a general GPS tracking software for many types of devices. There is also a commercial version.
There are some details missing, but the jist of what needs to happen is here.

*Please keep in mind that I live VERY near St. Louis and was writing this during the World Series Championship game 6 and game 7! I've been distracted to say the least ;)

OpenGTS Config
manual is the REAL source for what needs to be done, but here are the steps for CentOS 6.0 with a little strategy difference (I wanted to use the CentOS provided version of most everything).

If you want to use the "real" java SDK, fine, download it from HERE and change the rest of the java install accordingly:
yum install ant mysql-connector-java java-1.6.0-openjdk tomcat6 apache-tomcat-apis httpd classpathx-mail cd /opt wget "http://sourceforge.net/projects/opengts/files/server-base/2.3.8/OpenGTS_2.3.8.zip/download" unzip OpenGTS_2.3.8.zip ln -s OpenGTS_2.3.8 OpenGTS

Create environment file
cat >> /etc/profile.d/opengts.sh << EOF #The Java JDK (NOT the JRE) installation directory. #export JAVA_HOME=/usr/java/latest export JAVA_HOME=/usr/lib/jvm/java-1.6.0-openjdk-1.6.0.0.x86_64 #The Apache Ant installation directory. #export ANT_HOME=/usr/lib64/gcj/ant #The Apache Tomcat installation directory. export CATALINA_HOME=/usr/share/tomcat6 #The OpenGTS installation directory. export GTS_HOME=/opt/OpenGTS EOF . /etc/profile.d/opengts.sh

If you don't want to use the "classpathx-mail" javamail.jar you can download the mail.jar from Oracle or  here:
unzip javamail1_4_4.zip cp -p ~/javamail-1.4.4/mail.jar $JAVA_HOME/jre/lib/ext/
OR just use the one installed:
ln -s /usr/share/java/javamail.jar $JAVA_HOME/jre/lib/ext/

Here are a couple of symlinks that help out:
mkdir /usr/share/tomcat6/common/lib cd /usr/share/tomcat6/common/lib ln -s /usr/share/java/tomcat6-servlet-2.5-api-6.0.24.jar servlet-api.jar ln -s /usr/share/java/mysql-connector-java-5.1.12.jar $JAVA_HOME/jre/lib/ext/

The real meat of the install of the java stuff:
cd $GTS_HOME ant all ant track.war ant track.deploy

A couple of housekeeping commands to silence warnings/errors before running the checkInstall.sh:
ln -s $JAVA_HOME java ln -s $CATALINA_HOME tomcat ln -s $GTS_HOME gts $GTS_HOME/bin/checkInstall.sh

Correct issue noted from the checkinstall script.

Initialize the database and get the demo stuff up and going:
service mysqld restart service tomcat6 restart echo "create database demo;"|mysql $GTS_HOME/bin/initdb.sh -rootUser=root -rootPass= $GTS_HOME/bin/admin.pl  Account -account=demo -nopass -create $GTS_HOME/bin/admin.pl  Device -account=demo -device=demo  -create $GTS_HOME/bin/admin.pl  Device -account=demo -device=demo2 -create $GTS_HOME/bin/dbAdmin.pl   -load=EventData -dir=./sampleData

Look at $GTS_HOME/logs/TrackWar.log or /var/log/tomcat6/catalina.2011-10-26.log for issues.

Next part will be connecting a real test client to this server... coming soon!

http://www.opengts.org/FAQ.html
http://wiki.osgeo.org/wiki/Enterprise_Linux_GIS#RHEL.2FCentOS.2FSL_6_:_Packages_Status_Summary

Saturday, October 22, 2011

CentOS 6.x updated wine-1.3.29 install howto

Stable is good! That's why I like the CentOS/SL/RHEL distrobutions. But sometimes you need to kick it up a notch and go more recent with specific packages. It might be an office suite update or a Xen update or even a PHP update; it doesn't matter, you just need some part that is, well, more recent. This time it's wine. And, instead of version wine-1.2 stable something, you get to most recent and kick-ass version 1.3 something. I can say that the wine-1.3 is much better at handling the oddities of running  the most recent Google Windows Picasa version. Let's face it, the Linux version 3.0 is OK, but WAYYYY dated. Besides, the face recognition is much better in Picasa 3.8. Enough fluff; down to business. Start off with some good information from the CentOS RPMForge link
and make sure to set up either priorities or ProtectBase. Get familiar with RPMForge/Repoforge. Then install it the important repository:
(32bit)
rpm -ihv http://packages.sw.be/rpmforge-release/rpmforge-release-0.5.2-2.el6.rf.i686.rpm

(64bit)
rpm -ihv http://packages.sw.be/rpmforge-release/rpmforge-release-0.5.2-2.el6.rf.x86_64.rpm
By the way, this wine upgrade also works with CentOS/SL/RHEL version 5.x. Just substitute "el5" for"el6" above.

Get rid of the old:
yum remove wine\*

In with the new:
yum install wine --disablerep=\* --enablerepo=rpmforge-testing

All done! Time to pay attention to the St. Louis Cardinals as they play for the World Series World Series against Texas ;)

Wednesday, October 19, 2011

CentOS 6.x Mythtv 0.24 plus Hauppauge PVR-500 setup hotwo

Let me start by stating that getting this setup to be functional was a frustrating experience. Mostly due to my lack of Mythtv setup experience. It's not to say that I have not been using Mythtv for a very long time. It's more along the lines that I run the boxes for sooooo long without issue and therefore don't have to deal with setup very often. The box I'm replacing was a venerable CentOS 5 setup with a single Hauppauge PVR-250. The other issue is that I introduced some new-to-me equipment (the PVR-500) and most found documentation did not directly pertain to the mythtv-0.24 version.

Basic CentOS 6.0 32bit is documented in a previous post. This will be more about the setup of the Hauppauge PVR-500 since that was really the only problem.

There is some some information in the Mythtv wiki that is helpful.

Please keep in mind that my main intent is to show the PVR-500 setup and not all
the easy other stuff.

Step 1: run mythtvsetup
Step 2: select "Capture cards" -> "New capture card"

Step 3: from "Card type:" select "H.264 encoder card (HD-PVR)" then "Finish"

Step 4: select "New capture card" -> "Card type:" select "H.264 encoder card (HD-PVR)" again. This time change "Video device:" to "/dev/video1" then "Finish"

Step 5: add your "Video source" and "Input connections" and follow any other instructions you have ;)


Error messages I had while trying to get the PVR-500 setup correctly:
snd_pcm_open_noupdate unknown pcm default
Error: Failed to open audio device ALSA:default
Encountered problems running /usr/bin/mythpreviewgen

Note: vlc error:
*** glibc detected *** vlc: free(): invalid pointer:
 Solution was simple for this 32bit install, as root:
mv /usr/lib/vlc/plugins/meta_engine/libtaglib_plugin.so ~/libtaglib_plugin.so-vlc-issue

Google Music Manager native Linux client install and review

To Google's credit they have quickly moved to a native Linux client with their beta Music Manager, The "google-musicmanager-beta-1.0.18.6104-0.i386" was built on September 14 and made available on September 24 2011. The initial Music Manager was built on wine like some other notable Google products (like Picasa). The Linux version of the Music Manager is now native! And since there is no bundled wine the install size is a very modest 9.5MBish.

I am running this test on CentOS 6.0(CR). Other choices for downloads is available from HERE or by going to your "ADD MUSIC" option toward the top right of the music.google.com screen after Google login. Google has downloads for Debian/Ubuntu and for Fedora/openSUSE in both 32bit and 64bit:
As root install your download. For my CentOS box I did:
yum install google-musicmanager-beta-1.0.18.6104-0.i386

 You can run the program from the command line by just typing  at your GUI prompt:
google-musicmanager

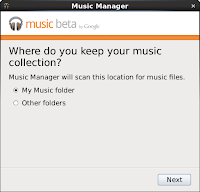
To run the Linux Google Music Manager from the Gnome desktop, just select "Applications" -> "Internet" -> "Google Music Manager". You will be greeted with this start sequence:


Here is a screenshot of the "About" for this installed version:

Here is a screenshot of the Gnome panel view of the running Music Manager:


Firefox seems well supported for Google Music when you have Flash installed:

Wednesday, October 12, 2011

CentOS 6.x Mythtv 0.24 install and setup hotwo

This is originally created with CentOS 6.0. Prior to the release of CentOS 6.1, I strongly urge all admin's to use the CentOS 6.0 CR Updates to enhance the security of your system. Also, my CentOS Mythtv server was a  "Desktop" install option for this example. I have cable TV and have used both the Hauppauge PVR-250 and now the Hauppauge PVR-500 since my needs are basic.

UPDATE: I have the PVR-500 CentOS 6 setup info with pictures for mythtv 0.24 now.

Get the security related updates first:
rpm -ihv /home/pj/Downloads/centos-release-cr-6-0.el6.centos.i686.rpm yum update

Install both EPEL and RPMFORGE repositories and please remember to also install *AND* setup either priorities or protectbase yum plugins.
rpm -ihv http://dl.atrpms.net/all/atrpms-repo-6-4.el6.i686.rpm rpm -ihv http://download.fedora.redhat.com/pub/epel/6/i386/epel-release-6-5.noarch.rpm yum install yum-plugin-priorities


Do these error messages look familiar?
 --> Processing Conflict: 1:qt47-x11-4.7.2-1_18.el6.i686 conflicts qt-x11 < 1:4.7.2-1_18.el6
--> Processing Conflict: 1:qt47-x11-4.7.2-1_18.el6.i686 conflicts qt4-x11 < 1:4.7.2-1_18.el6
--> Processing Conflict: 1:qt47-x11-4.7.2-1_18.el6.i686 conflicts phonon < 4.3.80-1
Error: qt47-x11 conflicts with qt-x11

OR
file /usr/share/man/man3/XML::SAX::Base.3pm.gz conflicts between attempted installs of perl-XML-SAX-Base-1.04-3.el6.noarch and perl-XML-SAX-0.96-7.el6.noarch
file /usr/share/man/man3/XML::SAX::Exception.3pm.gz conflicts between attempted installs of perl-XML-SAX-Base-1.04-3.el6.noarch and perl-XML-SAX-0.96-7.el6.noarch

Clean out the older/problem bits:
yum remove qt-x11 qt phonon perl-XML-SAX-Base

Install the initial problem packages:
yum install qt47 qt47-x11 qt47-webkit qt47-mysql --enablerepo=atrpms-testing


The big download and install:
yum install mythtv --enablerepo=atrpms-testing --exclude=perl-XML-SAX-Base

Make sure mysqld and mythbackend on going to try and start on boot
chkconfig mythbackend on mysqld on

You really need to read through the mythtv-HOWTO or even Installing MythTV on RHEL/CentOS

I'm migrating from CentOS 5.7 -> 6.0 following normal backup and restore steps:
service mysqld start mysql < /usr/share/doc/mythtv-docs-0.24.1/database/mc.sql


A new simple no-security-just-get-it-running setup could include:
echo 'grant all on mythconverg.* to mythtv@"%" identified by "mythtv";' |mysql mythconverg echo 'flush privileges;'|mysql mythconverg mythtv-setupp


Again, you really need to read through the mythtv-HOWTO or even Installing MythTV on RHEL/CentOS for your specific tuner card.

http://www.gossamer-threads.com/lists/atrpms/users/15601

Monday, October 10, 2011

Dell printer firmware update stupidity and howto

Not sure why Dell is taking recent steps backwards with regard to Linux support, but clearly it is. The recent BIOS update issues have given way to printer update utilities that are not Linux install friendly. The most recent example is the otherwise decent Dell 2555dn MFP. The previous A02 version of the firmware (DELL_2355DN-MONO-LASER-MFP_A02_R302331.exe) was just a self-extracting zip file. So a simple
unzip DELL_2355DN-MONO-LASER-MFP_A02_R302331.exe
would provide me with the needed "*.hd" (Dell2355dn_A02_v2.70.03.06.hd in this case) firmware file to load via the update firmware web page.
Now Dell seems to add in their install/extractor utility like the general Windows driver files have... and it takes some extra effort.

My current system/admin setup is based on CentOS 6.x but any recent distro will likely be very close. I'm going to assume that you have already downloaded the file and you are at a command/terminal prompt.

1. Install wine as root
yum install wine cabextract

2. As a normal user get winetricks and install "vcrun6"
wget http://winetricks.org/winetricks chmod +x winetricks ./winetricks vcrun6


3. As a normal user run the installer like and just exit after the GUI comes up
wine Dell2355dn_A03_2.70.03.08.exe

4. After you should be able to find the needed *.hd file in "~/.wine/drive_c/users/YOUR_USERNAME/Temp/". For this example, it was "~/.wine/drive_c/users/pj/Temp/Dell2355dn_A03_2.70.03.08.hd"

Possible error messages:
If you don't have the VBRUN 6 installed (vcrun6) you will get an error like:
err:module:import_dll Library MFC42.DLL (which is needed by L BLAHBLAH) not found
err:module:LdrInitializeThunk Main exe initialization for L BLAHBLAH failed, status c0000135

Friday, September 30, 2011

CentOS 6 lpadmin generic postscript printer addition

It really took a while for me to figure out how to add printers via the command line using lpadmin on CentOS 6. So, this information also will apply to newer Fedora users as well as RHEL 6 users:

For generic LPD/LPR Postscript print server:
lpadmin -p printer_name -m drv:///sample.drv/generic.ppd -v lpd://your_print_server/raw1 -D "Your printer description" -L "Your printer location" -o printer-error-policy=retry-job -o printer-is-shared=false -E


For generic LPD/LPR PCL print server:
lpadmin -p printer_name -m drv:///sample.drv/generpcl.ppd -v lpd://your_print_server/raw1 -D "Your printer description" -L "Your printer location" -o printer-error-policy=retry-job -o printer-is-shared=false -E

For Jetdirect/RAW print servers
lpadmin -p printer_name -m drv:///sample.drv/generic.ppd -v socket://your_print_server:9100 -D "Your printer description" -L "Your printer location" -o printer-error-policy=retry-job -o printer-is-shared=false -E

The new part is "drv:///sample.drv/generic.ppd" as the model instead of "postscript.ppd.gz" or similar from the past. This seems to trigger a ppd file build from the script/file of "/usr/share/cups/drv/sample.drv" as part of the cups package.

Notes:
I don't like the default option of not retrying failed jobs. It's a dumb default IMHO! The "-o printer-error-policy=retry-job" is a better choice.

I also tend to turn off sharing as a general rule. You may want it on, however. The "-o printer-is-shared=false" turns off printer sharing.

The Jetdirect/RAW printer socket can change for print servers with multiple ports. First port is 9100, second is 9101 etc. The same kinda process exists for the LPD/LPR print server where "raw1" will increment for printer port as a generic rule.

Saturday, September 17, 2011

CentOS 6.0 Zimbra 7.1.2 Open Source Edition misc setup notes

This not a formal information page... it is a free form of helpful Zimbra bits of information that I needed in order setup a Zimbra server. This Zimbra setup has a seperate openldap server as the authentication server. The ldap specific stuff has been removed. We were moving from a VERY distributed mail setup. Each of the 40 plus remote sites is a mail destination, each with it's own mail server (postfix) and IMAP (dovecot) setup.

#to set env variables needed by zimbra provided services
. ~/bin/zmshutil ; zmsetvars

#sets zimbra to listen in https mode restart of zimbra needed (as zimbra)
zmtlsctl https

#set max upload imap size to 30MB (as zimbra)
zmprov mcf zimbraFileUploadMaxSize 30000000

#to get the zimbraID COS "class of service" (as zimbra)
zmprov gc Default |grep zimbraId:

#this will let all your users login with just the first part of their e-mail address (as zimbra)
zmprov mcf zimbraDefaultDomainName YOURDOMAIN.WHATEVER

#set up bulk add from host with authentication connection for users
getent passwd | egrep -v "thing1|thing2|:x:|:\*:" | sort -t : -k 3g,3 > /tmp/ldapinfo.txt perl zimbra-passwd2zmprov.pl -domain YOURDOMAIN.WHATEVER -password ZIMBRA_PASSWORD < /tmp/ldapinfo.txt > ldapinfo.zmp

#if you still need to route most users through another server until migration (as zimbra)
cat ldapinfo.zmp |perl -e 'while (<>) { chop;print ($_," zimbraMailTransport smtp:MAIL.YOURDOMAIN.WHATEVER:25\n"); }' > ldapinfo1.zmp zmprov < ldapinfo1.zmp

#increase the number of threads for lmtp, imap, http(s) etc (as zimbra) from http://wiki.zimbra.com/wiki/Performance_Tuning_Guidelines_for_Large_Deployments
zmprov ms `zmhostname` zimbraHttpNumThreads 500
zmprov ms `zmhostname` zimbraImapNumThreads 500
zmprov ms `zmhostname` zimbraLmtpNumThreads 50
zmprov ms `zmhostname` zimbraMessageCacheSize 10000 zmlocalconfig -e mailboxd_java_heap_size=9830 #20% of system ram - system ram = 48GB for this example zmlocalconfig -e zimbra_require_interprocess_security=0

#for users moving to Zimbra server that had other mail destinations
zmprov ma "YOURUSER@YOURDOMAIN.WHATEVER" zimbraMailHost ZIMBRA.YOURDOMAIN.WHATEVER zmprov ma "YOURUSER@YOURDOMAIN.WHATEVER" zimbraMailTransport lmtp:ZIMBRA.YOURDOMAIN.WHATEVER:7025

#added next 3 lines to /etc/sysctl.conf based on info from zimbra http://wiki.zimbra.com/wiki/Performance_Tuning_Guidelines_for_Large_Deployments
net.ipv4.tcp_fin_timeout=15 net.ipv4.tcp_tw_reuse=1 net.ipv4.tcp_tw_recycle=1
#also modified /opt/zimbra/conf/my.cnf after memory addition to server
innodb_buffer_pool_size innodb_max_dirty_pages_pct

#/opt/zimbra/mysql/bin/mysqlcheck errors:
mysql.general_log Error : You can't use locks with log tables. mysql.slow_log Error : You can't use locks with log tables.
fix with:
mv /cassens/zimbra/db/data/mysql/*_log.frm /tmp/ /etc/init.d/zimbra restart

#mount zimbra filesystem with "noatime" option

#web pages or external info:
http://wiki.zimbra.com/wiki/Split_Domain
http://wiki.zimbra.com/wiki/Mysql_Crash_Recovery
http://wiki.dovecot.org/Authentication/MasterUsers
http://wiki.zimbra.com/wiki/Zmprov_Examples
http://www.zimbra.com/docs/ne/latest/administration_guide/wwhelp/wwhimpl/js/html/wwhelp.htm#href=ZCS_Admin_Guide_7_NE.Managing_Resources.html
http://www.zimbra.com/docs/ne/latest/administration_guide/wwhelp/wwhimpl/js/html/wwhelp.htm#href=ZCS_Admin_Guide_7_NE.VMware_Zimbra_Collaboration_Server.html
http://wiki.zimbra.com/index.php
http://wiki.zimbra.com/wiki/Performance_Tuning_Guidelines_for_Large_Deployments
http://wiki.zimbra.com/wiki/Open_Source_Edition_Backup_Procedure
http://wiki.zimbra.com/wiki/Moving_ZCS_to_New_Server
http://wiki.zimbra.com/wiki/Guide_to_imapsync

Thursday, August 25, 2011

How to set or reset a Dell Service Tag

Kinda bummed about having to do this on my own, but it just seemed easier. I have a Dell PowerEdge R710 that DID NOT handle either a iDrac or BIOS version update very well. The BIOS would not show a version number and the iDRAC6 would just hang. Couldn't reset the iDRAC and could barely get the box running again (had to pull power and do a dance and hope for it to boot). Most of the time the iDRAC boot option would get auto selected... long story. None of the 2 days of work requested by Dell tech's helped... they had to replace both the motherboard and iDRAC6 card. (on a side note, I may post on the large number of ways to flash firmware or BIOS's that Dell has provided to Linux users)

Sadly, the "asset" program the tech had with him seemed to only set the "Asset Tag" and not the Service Tag. The BIOS was the only thing that would show the Service Tag correctly. None of the normal ways to get the ST would produce results:
dmidecode -s system-serial-number racadm getsvctag getSystemId
I did find a DOS asset.exe executable, but who wants to boot a server system to DOS?! There was the lonesysadmin.net peeps with a plausible boot .iso... nah, there's gotta be a better way without having to resort to that... More google'n and bingo the hint I needed.

Turns out that the OMSA install I had could do what I wanted. I just didn't know it. At least for CentOS 6.0 and with smbios-utils-python-2.2.26-6.1.el6.x86_64 on a Dell R710 with BIOS 3.0.0, I can run:
smbios-sys-info --service-tag --set=123456
and this will set/reset my newly replaced motherboard to have the Service Tag I need! Please note that this Service Tag also persists over reboots unlike some older posts seem to have issues with.

As always, YMMV

Tuesday, August 16, 2011

CentOS 5.6 bugzilla email reply-to bugs howto

This is a quick and dirty set of steps to get an internal bugzilla to allow replies from bugzilla emails to be added to a bug. I'm sure there is a more "proper" way, but since the user that runs email is "nobody" for CentOS, I don't see how at this time.

First, I am using the EPEL repository in order to be a newer bugzilla than is provided with stock CentOS 5.6 at this time. In fact, I tend to even use the "testing" repo in order to get what I want. The current version as of this writing is bugzilla-3.2.10-1.el5 if you are interested. The information here is realy just a documentation place for what I have had to do for a while now.

/usr/share/bugzilla/checksetup.pl

Make sure you have all the perl modules to run email_in.pl at least from the command line. If you run this, it should *not* return any error. It should just sit there waiting for input; just +c to terminate.

/usr/share/bugzilla/email_in.pl

Make sure you have a bugzilla alias. Make sure to check a past email to see what the reply-to address is going to be. You can add the alias like the following on the server that has bugzilla running on it.
echo 'bugzilla-daemon:"| cd /usr/share/bugzilla/ ; /usr/share/bugzilla/email_in.pl -vvv > /tmp/email_in.pl.out 2>&1"' >> /etc/aliases newaliases

Here is the shotgun approach I took in order to get replies to function. Keep in mind that this system does *not* have user accounts on it and is internal to a network. I would *NOT* do this for on with user accounts or if it was exposed to the outside world. If you happen to know the proper way to handle this, drop me a note!

find /var/lib/bugzilla/data -type d -exec chmod 755 {} \; find /var/lib/bugzilla/data -type f -exec chmod 744 {} \; find /var/lib/bugzilla/data \( -name "*.pm" -o -name "*.pl" -o -name "*.cgi" \) -exec chmod 755 {} \; find /usr/share/bugzilla/ -type f -exec chmod 744 {} \; find /usr/share/bugzilla/ -type d -exec chmod 755 {} \; find /usr/share/bugzilla/ \( -name "*.pm" -o -name "*.pl" -o -name "*.cgi" \) -exec chmod 755 {} \; chmod 755 /etc/bugzilla/ chmod 744 /etc/bugzilla/localconfig

Please note that *any* time you run "checksetup.pl", you will need to redo the commands above! That perl script will make the bugzilla install more secure again. It is good practice to make sure that you can past most all of the module recommendations it has prior to doing anything else.

When you start wanting to send test messages to bugzilla, make sure to watch the maillog for errors. Those errors *may* also come back as emails if you are lucky.
tail -f /var/log/maillog|grep bug

Also, based on an email_in.pl bugzilla bug I slightly modified the /usr/share/bugzilla/email_in.pl by applying THIS very easy patch to fix this next error.

Use of uninitialized value in concatenation (.) or string at Bugzilla/DB.pm line 106, <STDIN> line 49.
Use of uninitialized value in require at (eval 99) line 2, <STDIN> line 49.
Use of uninitialized value in concatenation (.) or string at Bugzilla/DB.pm line 106, <STDIN> line 49.
Can't call method "isa" without a package or object reference at /usr/share/bugzilla/email_in.pl line 303, <STDIN> line 49.

If the permissions are messed up, you will get errors like:


Use of uninitialized value in concatenation (.) or string at Bugzilla/DB.pm line 106, <STDIN> line 57.
Use of uninitialized value in require at (eval 100) line 2, <STDIN> line 57.
Use of uninitialized value in concatenation (.) or string at Bugzilla/DB.pm line 106, <STDIN> line 57.
'' is not a valid choice for $db_driver in localconfig: Null filename used 

OR

Error reading /var/lib/bugzilla/data/params: Permission denied at Bugzilla/Config.pm line 319.
Compilation failed in require at /usr/share/bugzilla/email_in.pl line 43.
BEGIN failed--compilation aborted at /usr/share/bugzilla/email_in.pl line 43.

OR

Use of uninitialized value in string ne at Bugzilla/Util.pm line 290, <STDIN> line 49.
Use of uninitialized value in string eq at process_bug.cgi line 435, <STDIN> line 49.
of uninitialized value in string eq at Bugzilla/Mailer.pm line 57.
Use of uninitialized value in string eq at Bugzilla/Mailer.pm line 121.
Use of uninitialized value in pattern match (m//) at Bugzilla/Mailer.pm line 141.
Use of uninitialized value in string eq at Bugzilla/Mailer.pm line 152.
Use of uninitialized value in string eq at Bugzilla/Mailer.pm line 160.
error: template error: file error - failed to create compiled templates directory: /var/lib/bugzilla/data/template/template/en/default/global (mkdir /var/lib/bugzilla/data/template: Permission denied 

Sunday, August 14, 2011

Garden of the Gods horseback riding review - Academy Riding Stables

Family vacations can still be an opportunity to blog. This one is not geek related in any way, however. Other than this geek had a GREAT time horseback riding on trails of the Garden of the gods. The horses and guides were provided by:
Academy Riding Stables
phone (888)-700-0410 or phone (719)-633-5667
4 El Paso Blvd. Colorado Springs, CO 80904
I even got a discount of a couple of bucks per person from pikes-peak.com.

The Academy Riding Stables are very well organized group. Even when a larger group than originally expected group appeared. They split our 2 hour time slot into 2 groups instead of one larger one. Each group had both a lead rider and trailing rider. Safety seemed to be a high priority for the leaders. There was emphasis on how to approach, mount and ride the horses in a safe way. Helmets were provided for all that wanted them and use of helmets was encouraged. There were 10 riders from 8(ish) to much older. A person in charge selected horses of appropriate sizes based on each riders' size. My horse was very well suited to me and was well behaved.

Our ride began with a rather uneventful trek through a portion of residential area that borders Garden of the gods. This was a couple of blocks that included public roads and alleys. A trail was started about 10 minutes into the ride. First portion of the trail was easy and very wide. The horses knew were they were going and none ventured from the path. The first third a portion of the park that was generally easy with more gentile hills and valley like views.

The next 2/3 of the ride were primarily single horse width trails with changing terrain. Some climbs were very exhilarating both in final view of the area and ability of the horses to get up them. I was very thrilling to have my horse going down some rather steep steps with little effort. Even my youngest thought this was very exciting! Theses trails were not part of the general hiking area of the Garden of the gods if you were to go into the main rock formation area. We had views of part of that area, but our route focused on more of the perimeter. The views from the top of some of the hills are very breathtaking! The surrounding mountains and area are just beautiful. Words do not do justice to the majestic view that I had.

The ride lasted for 2 hours and included interesting commentary from the ride leaders. They made every effort to make sure all of the group was given information about the area we were in. Many times the end support rider would repeat the entire message to make sure the end riders understood. The information they provided was both interesting and worthwhile.

On a animal treatment note, I would like to commend the Academy Riding Stables for how well they seem to treat the animals in their care. Each horse that was brought for a rider was known by name and treated with kindness. Each of the riders was made aware that the horses should be allowed to drink their fill of water before the trip. Horse handling instructions were emphasized. All the horse stables seemed to be well kept and stocked with plenty of food. There was large areas for horsed to roam free. Heck even observed a couple of horses that were given showers while we were waiting for our turn to ride.

Make sure to get there early to fill out the paperwork. Reservations are required.

Google has lots of images
I will post some of my own pics very soon. I even used my DroidX with GPS tracking to map the route.
Note: I did not receive any compensation for this review.

Tuesday, August 2, 2011

CentOS 6.0 Zimbra 7.1.1 Open Source Edition install

Update 8/12/2011:
Good news! CentOS 6.x is out of beta and in stable with version 7.1.2 from HERE. In fact, you may just want to check their download page.

I wanted to take a peak at what is going on with Zimbra and CentOS 6 install capability. Currently, CentOS 6/RHEL 6 is listed as a beta for Zimbra 7.x installs. To to be deterred, I grabbed the beta download from the beta download page
wget http://files2.zimbra.com/downloads/7.1.1_GA/zcs-7.1.1_GA_3196.RHEL6_64.20110527010625.tgz
Test server is decent Dell Poweredge 2950 type II with 2 Intel quad core E5335 with 6GB RAM, RAID 1 for / (qty 2x80GB SATA) and RAID 5 for /opt (qty 4x500 SATA)
CentOS 6.0 x86_64 install was done as a "web server" install to provide most options I thought I would need as a start for the Zimbra install.

Note: I always suggest to install OMSA on any Dell server!

After the system is setup make sure that services that will interfere with Zimbra installed version are stopped and will not turn on at boot time:
chkconfig postfix off service postfix stop chkconfig httpd off service httpd stop tar -xzvf zcs-7.1.1_GA_3196.RHEL6_64.20110527010625.tgz cd zcs-7.1.1_GA_3196.RHEL6_64.20110527010625 ./install.sh
64 bit install but the installer still wants "libstdc++-4.4.4-13.el6.i686" installed.?
yum install libstdc++-4.4.4-13.el6.i686
Read Zimbra install info seems to be the moral of the story.

Finally installed with:
./install.sh --platform-override
followed prompts. Initial failure with log message with many:
sudo: sorry, you must have a tty to run sudo

Ran visudo to temporarily comment the "Defaults    requiretty" line and then ran:

/opt/zimbra/libexec/zmsetup.pl
To complete the install. Reboot just to make sure everything starts and begin the setup process. Now on to the much harder Zimbra setup!

Wow, still not done! Zimbra zmconfigd seems to need netcat, but is not a rpm requirement.??
yum -y install nc

Also, the install seems to need a patch before I can start working:
wget http://files2.zimbra.com/downloads/7.1.1_GA/zcs-patch-7.1.1_GA_3213.tgz

Sunday, July 31, 2011

CentOS 6.0 install on Dell E6410 laptop

First I would like to say, "Thank You!" to all of the hard working developers and other at CentOS. In spite of some VERY well published delays in getting CentOS 6.0 out the door, it's finally here! I hope to see 6.1 soon.

I am using a more recent Dell E6410 laptop with 4GB RAM, an Intel i7 M620 CPU and dedicated nVidia GT218 [NVS 3100M] video card. WIFI is handled by the Broadcom BCM4314 chipset. Pretty good by current standards. It's the same laptop I have used for my Fedora 13 review.

When I first went to burn the i386 .iso file, k3b greeted me with an interesting, "your image will not fit on your disk" kinda message. I was puzzled and then discovered the issue noted in the CentOS 6.0 release notes about the DVD+R media creation issue. Fair enough, I did not have at the time any other media, so I just overburned past the disk and tried to boot from the media anyway (which worked fine for *my* install). Just don't try to validate the disk ;)

Next, my default DVD install attempt was met with a very disappointing blank/black screen with the onboard Nvidia ??? video card. My good buddy google quickly lead me to some information that either "nomodeset" kernel option or install with the "basic video driver" would be needed. And either of those allowed me to move on through the install.

Reboot after install leads to a rather disappointing 800x600 resolution login screen. At least there is a login screen at all. First a quick <ctrl><alt><f2> key sequence to dump me to console in order to log in as root in order to do a full update and reboot just to see if that will help my screen resolution issue with the *default* install. Darn, still no better resolution! Need to jump to elrepo's kmod-nvidia fast.

Normally, the rpmfusion repository would be my way to get the included BCM4313 with a simple
yum -y install broadcom-wl kmod-wl-`uname -r`
After being told by yum that there was nothing to install, I scratched my head and google'd a bit and found that "Due to an excessively restrictive license accompanying this Broadcom driver, the ELRepo repository developers have refrained from supplying it via an rpm package" according to at least CentOS Broadcom page. Shame on you Broadcom... at least there is a way around the issue based on the instructions on the CentOS page noted! It would be so much easier if Broadcom's legal would just relax.

The bluetooth functions without issue. I could pair with my Droidx in seconds.

Sadly, I don't seem to be able to update the BIOS from the Dell OMSA repository. Initial indications are that they don't care.

Here's the lspci for the laptop:

00:00.0 Host bridge: Intel Corporation Core Processor DRAM Controller (rev 02)
00:01.0 PCI bridge: Intel Corporation Core Processor PCI Express x16 Root Port (rev 02)
00:19.0 Ethernet controller: Intel Corporation 82577LM Gigabit Network Connection (rev 05)
00:1a.0 USB Controller: Intel Corporation 5 Series/3400 Series Chipset USB2 Enhanced Host Controller (rev 05)
00:1b.0 Audio device: Intel Corporation 5 Series/3400 Series Chipset High Definition Audio (rev 05)
00:1c.0 PCI bridge: Intel Corporation 5 Series/3400 Series Chipset PCI Express Root Port 1 (rev 05)
00:1c.1 PCI bridge: Intel Corporation 5 Series/3400 Series Chipset PCI Express Root Port 2 (rev 05)
00:1c.2 PCI bridge: Intel Corporation 5 Series/3400 Series Chipset PCI Express Root Port 3 (rev 05)
00:1c.3 PCI bridge: Intel Corporation 5 Series/3400 Series Chipset PCI Express Root Port 4 (rev 05)
00:1d.0 USB Controller: Intel Corporation 5 Series/3400 Series Chipset USB2 Enhanced Host Controller (rev 05)
00:1e.0 PCI bridge: Intel Corporation 82801 Mobile PCI Bridge (rev a5)
00:1f.0 ISA bridge: Intel Corporation Mobile 5 Series Chipset LPC Interface Controller (rev 05)
00:1f.2 RAID bus controller: Intel Corporation Mobile 82801 SATA RAID Controller (rev 05)
00:1f.3 SMBus: Intel Corporation 5 Series/3400 Series Chipset SMBus Controller (rev 05)
00:1f.6 Signal processing controller: Intel Corporation 5 Series/3400 Series Chipset Thermal Subsystem (rev 05)
01:00.0 VGA compatible controller: nVidia Corporation GT218 [NVS 3100M] (rev a2)
01:00.1 Audio device: nVidia Corporation High Definition Audio Controller (rev a1)
03:00.0 Network controller: Broadcom Corporation BCM4313 802.11b/g LP-PHY (rev 01)
04:00.0 SD Host controller: Ricoh Co Ltd Device e822 (rev 03)
04:00.4 FireWire (IEEE 1394): Ricoh Co Ltd Device e832 (rev 03)
3f:00.0 Host bridge: Intel Corporation Core Processor QuickPath Architecture Generic Non-core Registers (rev 02)
3f:00.1 Host bridge: Intel Corporation Core Processor QuickPath Architecture System Address Decoder (rev 02)
3f:02.0 Host bridge: Intel Corporation Core Processor QPI Link 0 (rev 02)
3f:02.1 Host bridge: Intel Corporation Core Processor QPI Physical 0 (rev 02)
3f:02.2 Host bridge: Intel Corporation Core Processor Reserved (rev 02)
3f:02.3 Host bridge: Intel Corporation Core Processor Reserved (rev 02)

Helpful links:
E-Family Reimage “How-To” Guide
E6410 Manuals

Thursday, July 28, 2011

LibreOffice for CentOS 5 or CentOS 6 install howto

OpenOffice at this point seems to have stalled out with no recent bug fixes. The LibreOffice folks seem to to be be moving forward and fixing issues. This is just a simple install howto for getting LibreOffice onto your otherwise stock CentOS 5 or CentOS 6 desktop system. If you are doing these easy steps, you might as well take the steps to get Thunderbird 5 or FireFox 5 on your system. I have every reason to believe that all of these steps will work just fine for any Scientific Linux 5 or 6. Heck might as well just stall onto the otherwise identical RedHat Enterprise Linux RHEL 5 or RHEL 6.

First download a version of your choice.

UPDATE 05/02/2012: the following code has been updated for the 3.5.3 release of LibreOffice.

wget "http://download.documentfoundation.org/libreoffice/stable/3.5.3/rpm/x86/LibO_3.5.3_Linux_x86_install-rpm_en-US.tar.gz" tar -xzvf LibO_3.5.3_Linux_x86_install-rpm_en-US.tar.gz cd LibO_3.5.3rc2_Linux_x86_install-rpm_en-US/RPMS/ mv desktop-integration/libreoffice3.5-freedesktop-menus-3.5.3-2.noarch.rpm ./ yum remove openoffice\* yum install --nogpgcheck lib*

You will likely want to install the helppack rpm
wget "http://download.documentfoundation.org/libreoffice/stable/3.5.3/rpm/x86/LibO_3.5.3_Linux_x86_helppack-rpm_en-US.tar.gz" tar -xvf LibO_3.5.3_Linux_x86_helppack-rpm_en-US.tar.gz
yum install --nogpgcheck LibO_3.5.3rc2_Linux_x86_helppack-rpm_en-US/RPMS/libobasis3.5-en-US-help-3.5.3-2.i586.rpm

You can copy line for line or copy paste into a script, but the jist of what needs to be done is easy to figure out above.

Redhat menus install nicely

Startup loading bar is nice

LibreOffice starts fast and looks familiar to existing OpenOffice users, but with more bug fixes

One easy upgrade! Nice job LibreOffice peeps! Enjoy.

Saturday, July 23, 2011

CentOS 6.0 install on Dell D630 laptop and short review

First I would like to say, "Thank You!" to all of the hard working developers and other at org.org. In spite of some VERY well published delays in getting CentOS 6.0 out the door, it's finally here! I hope to see 6.1 soon.

Once again, I am using my venerable Dell D630 laptop with 2GB RAM, a dual core Intel T7500 and dedicated nVidia G86M Quadro NVS 135M video card. WIFI is handled by the Broadcom BCM4312 802.11a/b/g chipset. Modest by today's standards. It's the same laptop I have used for my Fedora 15 beta review. I can say with certainty that both this laptop and I are very grateful to be running Gnome 2.x instead of 3.x!

When I first went to burn the i386 .iso file, k3b greeted me with an interesting, "your image will not fit on your disk" kinda message. I was puzzled and then discovered the issue noted in the CentOS 6.0 release notes about the DVD+R media creation issue. Fair enough, I did not have at the time any other media, so I just overburned past the disk and tried to boot from the media anyway (which worked fine for *my* install). Just don't try to validate the disk ;)

Next, my default DVD install attempt was met with a very disappointing blank/black screen with the onboard Nvidia NVS 135M quadro video card. My good buddy google quickly lead me to some information that either "nomodeset" kernel option or install with the "basic video driver" would be needed. And either of those allowed me to move on through the install.

The rest of the install proceeded without issues. After the reboot, I was glad to see the nouveau driver seems to work well enough after the initial install problem. I was even more happy to see my wifi (Broadcom Corporation BCM4312 802.11a/b/g) installed with *no* intervention. And by this time, I always expect the onboard ethernet of (Broadcom Corporation NetXtreme BCM5755M Gigabit Ethernet PCI Express) to work without issues or intervention. Thankfully, I was not disappointed with any networking issues. Sorry to say that this laptop does not have bluetooth onboard, so I can't test that.

I was greeted with good old Gnome 2 running after login. Everything looked fine at 1440x900 resolution without messing with any xorg.conf file! I do not yet see a reason to blacklist nouveau. I expect even less to use the a downloaded NVIDIA-Linux-*.run file as the elrepo binary kmod-nvidia* version will end up being no additional work after a kernel upgrade.

Laptop is running very stable, dynamic CPU fan control functions as expected. Suspend and resume has not had any issue at all with the nouveau driver. Nice to have it all just work (minus the install quirk).

More updated versions of most major apps would be better. OpenOffice 3.2 is included rather than 3.3 or even better now, the Libreoffice version that Fedora 15 has.

In the end, I would have to say that for a good solid Linux OS experience, I would suggest CentOS 6 as a good option to any current distribution. You will have a long support cycle and a very stable base.

I have a very minor annoyance that seems to be shared now with all the recent Fedora versions; resuming the laptop shows an initial screen that is your session even with the screen lock applied. This running session screen last only a second or two, but kinda odd that it shows at all.

As a note, I have added the "xdriver=vesa nomodeset" options to my PXE install for this class of device to get past the video driver issue on install.

For completeness, here is the lspci for this Dell D630:
00:00.0 Host bridge: Intel Corporation Mobile PM965/GM965/GL960 Memory Controller Hub (rev 0c) 00:01.0 PCI bridge: Intel Corporation Mobile PM965/GM965/GL960 PCI Express Root Port (rev 0c) 00:1a.0 USB Controller: Intel Corporation 82801H (ICH8 Family) USB UHCI Controller #4 (rev 02) 00:1a.1 USB Controller: Intel Corporation 82801H (ICH8 Family) USB UHCI Controller #5 (rev 02) 00:1a.7 USB Controller: Intel Corporation 82801H (ICH8 Family) USB2 EHCI Controller #2 (rev 02) 00:1b.0 Audio device: Intel Corporation 82801H (ICH8 Family) HD Audio Controller (rev 02) 00:1c.0 PCI bridge: Intel Corporation 82801H (ICH8 Family) PCI Express Port 1 (rev 02) 00:1c.1 PCI bridge: Intel Corporation 82801H (ICH8 Family) PCI Express Port 2 (rev 02) 00:1c.5 PCI bridge: Intel Corporation 82801H (ICH8 Family) PCI Express Port 6 (rev 02) 00:1d.0 USB Controller: Intel Corporation 82801H (ICH8 Family) USB UHCI Controller #1 (rev 02) 00:1d.1 USB Controller: Intel Corporation 82801H (ICH8 Family) USB UHCI Controller #2 (rev 02) 00:1d.2 USB Controller: Intel Corporation 82801H (ICH8 Family) USB UHCI Controller #3 (rev 02) 00:1d.7 USB Controller: Intel Corporation 82801H (ICH8 Family) USB2 EHCI Controller #1 (rev 02) 00:1e.0 PCI bridge: Intel Corporation 82801 Mobile PCI Bridge (rev f2) 00:1f.0 ISA bridge: Intel Corporation 82801HEM (ICH8M) LPC Interface Controller (rev 02) 00:1f.1 IDE interface: Intel Corporation 82801HBM/HEM (ICH8M/ICH8M-E) IDE Controller (rev 02) 00:1f.2 IDE interface: Intel Corporation 82801HBM/HEM (ICH8M/ICH8M-E) SATA IDE Controller (rev 02) 00:1f.3 SMBus: Intel Corporation 82801H (ICH8 Family) SMBus Controller (rev 02) 01:00.0 VGA compatible controller: nVidia Corporation G86M [Quadro NVS 135M] (rev a1) 03:01.0 CardBus bridge: O2 Micro, Inc. Cardbus bridge (rev 21) 03:01.4 FireWire (IEEE 1394): O2 Micro, Inc. Firewire (IEEE 1394) (rev 02) 09:00.0 Ethernet controller: Broadcom Corporation NetXtreme BCM5755M Gigabit Ethernet PCI Express (rev 02) 0c:00.0 Network controller: Broadcom Corporation BCM4312 802.11a/b/g (rev 01)

My intent is to soon publish a server based CentOS 5.6 -vs- CentOS 6.0 competition review using the same hardware. Stay tuned.

Monday, July 11, 2011

CentOS 5.6 Thunderbird 5 working setup and install howto

UPDATE: Thunderbird 6.0 does not require the hack below!

If you are getting the error
thunderbird-bin: /usr/lib/libstdc++.so.6: version `GLIBCXX_3.4.9' not found (required by libxul.so)
You have come to one of the correct places. This is a continuation of the FIreFox 4 install. Again, I did not come up with this on my own! I just want to spread the word as much as possible that one very enlightened fellow referenced as "rkl" at forums.mozillazine.org has made it possible for the rest of us to hit the "easy button" and got FireFox 4.0 working on CentOS 5.x (CentOS 5.6 at this time). HERE is the original link that I lucked upon while trying to google it on my own.

This is my mostly plagiarized summary based on the original FF4 information for the link above. My testing was specifically done on CentOS 5.6 32bit desktop install:
1. Unpack the Thunderbird thunderbird-5.0.tar.bz2 somewhere (e.g. /opt/thunderbird5). A quick way to get the tar file is from the mozilla Thunderbird EN download link.

2. Download this 32-bit Fedora 9 libstdc++ RPM and unpack it with this command:

rpm2cpio libstdc++-4.3.0-8.i386.rpm | cpio -i --make-directories

3. Move the unpacked shared library into /opt/thunderbird5:

mv usr/lib/libstdc* /opt/thunderbird5/

Note: It's "usr/lib/libstdc*" above (i.e. the unpacked tree from the RPM, not the system /usr/lib tree) - do NOT put a leading slash there!

4. Run Thunderbird 5 with:

/opt/thunderbird5/thunderbird

I will say that TB5 is an *major* improvement from Thunderbird 3.x. So far there are less mailbox issues than with previous versions.

Friday, June 24, 2011

CentOS 5.x FireFox 5 working install

UPDATE: FireFox 6.0 does not require the hack below!

If you are getting the error
firefox-bin: /usr/lib/libstdc++.so.6: version `GLIBCXX_3.4.9' not found (required by /opt/firefox5/libxul.so)
You have come to one of the correct places. This is a continuation of the FIreFox 4 install. Again, I did not come up with this on my own! I just want to spread the word as much as possible that one very enlightened fellow referenced as "rkl" at forums.mozillazine.org has made it possible for the rest of us to hit the "easy button" and get FireFox 4.0 working on CentOS 5.x (CentOS 5.5 at this time). HERE is the original link that I lucked upon while trying to google it on my own.

This is my mostly plagiarized summary based on the original FF4 information for the link above. My testing was specifically done on CentOS 5.6 32bit desktop install:
1. Unpack the Firefox firefox-5.0.tar.bz2 somewhere (e.g. /opt/firefox5). A quick way to get the tar file is from the mozilla EN download link.

2. Download this 32-bit Fedora 9 libstdc++ RPM and unpack it with this command:

rpm2cpio libstdc++-4.3.0-8.i386.rpm | cpio -i --make-directories

3. Move the unpacked shared library into /opt/firefox5:

mv usr/lib/libstdc* /opt/firefox5/

Note: It's "usr/lib/libstdc*" above (i.e. the unpacked tree from the RPM, not the system /usr/lib tree) - do NOT put a leading slash there!

4. Run Firefox 5 with:

/opt/firefox5/firefox

rkl references the FireFox 4 beta version, but all steps still apply for official FireFox 5 release.

I will say that FF5 is an incremental improvement from FF4. My initial usage has been positive. There seems to be a "follow the rapid release cycle of Google's Chrome" mentality. I hope this will not make it more difficult for organizations to break from the IE "standard".

Thursday, June 23, 2011

novi merge utility for creating a fully updated install (base plus updates)

Novi is a very handy repository merging utility! The purpose of novi is to remove the problem of a system install followed by an immediate update in order to get a system fully patched and ready to go into service. Maybe this quote from the website makes it more clear:
novi is a tool for finding the latest-version RPMs in a tree. You can use it to create Kickstart trees or yum repos that contain the updated RPMS. In the case of Kickstart, this means machines come to life with the updates already applied. Using novi for yum repos trims the size of the repodata files, which reduces client download and processing time.
In reality, novi saves time and resources. This is especially true when dealing with the Fedora distribution.

For example, if an install takes 15 minutes and then the update takes 30 minutes depending how you update (local mirror I hope), you end up with about 45 minutes of time. With novi, that's just 15 minutes total time to get to the same place. Plus you have a much cleaner install without all of those pesky .rpmnew and .rpmsave files cluttering up the pristine new filesystem.

Naturally, I team novi with PXE boot and Kickstart files for the ultimate in lazy installs on systems. I will only focus on the novi portion as much as possible and leave the other pieces for another time.

The most basic setup requires a machine with enough drive capacity to handle the the base install files (however you want to get them) and all of the updates that you may want. I don't want EVERY update, so I tend to limit what I get by excluding packages I will NEVER install. Really, I don't need anyone install AlienArena on any system under my control, for example ;) Luckily, novi can hard link the merged repository and not just add to any space issue. You will also need that server to provide ftp or http services for the merged repository in order to install a client. Ethan McCallum was nice enough to VERY WELL explain most all of the entire concept, already.

My current multi-repository mirror is a CentOS 5.x server. This example is *very simple* Fedora 13 via ftp install. This could also be a http accessible area. As stated above, I do have a fair number of items to exclude via rsync. I took the extra step of rpmbuild'ing the latest CentOS 5 capable version, 1.1.9 from src.rpm. Sadly, most every repository I found only had the 1.1.5 version. CentOS 6 will be able to use the newer 2.1.11 version (when released).

#!/bin/bash BASE_DIR="/var/ftp/pub/yum/Fedora/linux/releases/13" EXCLUDES="$BASE_DIR/13.excludes" INCLUDES="--include-from=$BASE_DIR/13.includes" LOCAL_DIR="$BASE_DIR/updates/" MERGED="$BASE_DIR/merged/i386" ADMINEMAIL=admin@yoursite.com MIRROR_SITE="rsync://mirrors3.kernel.org/fedora/updates/13/i386" LOGFILE="/tmp/`basename $0`.out" cd $MERGED for DIR in $LOCAL_DIR $MERGED_DIR do if [ ! -d "$DIR" ] then mkdir -p "$DIR" fi done rsync -PvaH --bwlimit=300 --timeout=600 $INCLUDES --exclude-from=$EXCLUDES --numeric-ids --delete --delete-after --delay-updates --delete-excluded $MIRROR_SITE $LOCAL_DIR >& $LOGFILE EXIT="$?" if [ "$EXIT" -eq "0" ] then rm -f Packages/*.rpm novi -a hardlink -t $MERGED/Packages $BASE_DIR/os/i386/Packages $LOCAL_DIR/i386 createrepo -g repodata/fce31f091be8211a394d8942fcf4f6cbeffa3d40d87b61af55a97b1a88b46987-Fedora-13-comps.xml $PWD else cat $LOGFILE | "ERROR in $0 on `hostname -s` exit status of $EXIT" $ADMINEMAIL fi

As usual, comments are welcome and appreciated! Again, this is a basic chunk of code that should be better fleshed out by you. It also only includes the i386 branch and is easily extended.

(Note: I know F13 is EOL, but we have been utilizing novi for a long time)

Wednesday, June 15, 2011

Google Music Beta review with screensthots

Background:
You've got mail... Stupid movie name aside, I got an email invite to play with Google's Music service. I like toys and this is just another kinda toy. There is nothing revolutionary in concept with this music service in concept or execution. Music streaming and downloading have been around for a while to say the least. Google just makes it easier and more convenient. It should be obvious to state the requirement of a Google account in order to start using the Music service. So, on to the review:

I will start with the bad. The Music Manager upload utility is Windows and Mac only. No direct GNU/Linux support! I will end up trying wine soon. If wine succeeds, I'll report back. Otherwise, I will need to add the Music Manager to my otherwise pristine gaming rig or bring up some Windows VM in order to upload.

Update 6/15/2011!: There is a working modified MusicManager that will work with Wine 1.3.21 on Fedora 15. I *could* also get it to work with Wine 1.3.18 from rpmforge-testing under CentOS 5.6. I could not get Wine 1.3.7 under CentOS 5.6 to run MusicManager, however.

Another bad, in my opinion is missing, "show lyrics" option. This kind of option is kinda lame for *GOOGLE* not to have. Don't they have an index on EVERYTHING?! A simple link out to a lyrics site the same way they handle the shopping would even be a good start. But some in browser option would be better.

The web interface could use a range delete like the gmail webmail has. For example, if you add any "free" songs, you will be forced to individually remove each unwanted song. That is not a trivial task when you mistakenly added *several* groups of free music. In addition, "Recently added" should allow a date range or similar IMHO. I can't even figure out what recently means in this context.

Now for the good news for GNU/Linux peeps: Google Music will work without issue under at least the CentOS 5.6 or Fedora 13 and Fedora 15 distributions using either FireFox 4 and Google's Chrome 12 browsers. Adobe Flash of some version is required, I have tested with 10.2.x and 10.3.x. If you use any flash-blocking add-on make sure to white list google.com. The Flashblock 1.5.14.2 I have on Fedora 15 with FireFox 4.0.1did block the flash, but did not show me a notice that it was blocking.


Browser controls are shown as simple player controls icons with shuffle and repeat options. In a normal Google fashion, there is not much fluff. Information presented on screen is basic, useful and utilitarian. This is a good thing in reality. If you think about, you should only visit the Google Music browser tab when you need to change something like a play list. It is very much a play and forget about browser tab.


Free songs are optionally provided you when activate your account. The songs I have come across are largely live versions of known songs. That's not completely the case, of course, but songs offered are worth the cost. Please keep in mind that you are limited to only 20,000 songs at this time.


Google has provided some basic Settings changes for the web version of the service. To their credit, you can opt of Google Music with the click of a mouse. You will loose all of the uploaded music of course, but you can do it. The same Settings page also displays registered devices to your Music account. Not much to look at here so move along.


Missing from the options is any parental controls or music content rating. I believe this needs to be corrected soon. Google has provided a ranking system as simple thumbs up or down. This option could use some improvement. I would like to have seen something more like Netfix has with a global ranking and the option to put your own ranking. This would make finding and buying new good songs much easier.

Speaking of buying, you are 2 clicks from shopping for any selected song. Not surprisingly, you are taken to the Google Shopping link for lots of buying choices. The buying options seem to drift quickly away from the starting song selected. Maybe that's good, maybe that's bad... I'm leaning towards bad - just slightly.

It should be noted that Google is looking to cover their but if you look at the usage agreement you are required to accept. I understand why, of course. I also find it acceptable to be allowed to only have one active player at a time. Make sure to read the fine print.

Beyond the browser usage, I also tested with my DroidX with Android 2.2.1 and the Google Music version v3.0.1.339. Newer versions may be better or worse... these are currently beta pieces after all.


Once again, utilitarian is the operative word when speaking of the Music App for Android. It is simple in layout and has very little fluff. Cover art is not made prominent, for example. Player controls are obvious and basic. We all know what a play button looks like, right.


Thought has been put into some of the back-end options. Specifically the cache and wifi options. I am very glad to see both. Heck anyone with anything but a truly unlimited data plan should be happy to see them. As you would expect, the cache option from the Music -> Settings option allows you to cache (keep a local copy) of the music you are streaming so you won't have too again any time soon. The wifi option allows allows for the ability to mandate that either streaming or downloading of music is done through the wifi connection. Heck that great in many ways. My home internet connection is WAY faster than the 3G I have and doesn't cost me any more. Nice going Google.


The down side of utilitarian is the realization that you might be missing something. One of the some-things for me seems to be an on-screen volume control. Not critical by any stretch. After all, there is that up-down volume button on the side after all.


My overall belief is Google Music is a winner. With ease of use, flexible device connectivity and Google is behind it, many people will enjoy this service.