Showing posts with label centos. Show all posts

Monday, October 29, 2012

Zimbra 8.0 upgrade from Zimbra 7.2 on CentOS 6.x quicky

Woot Woot. The rather well done Zimbra Collaboration Server ("enterprise-class email, calendar and collaboration solution") has a major version change from 7.2.1 to version 8.0.0! We choose to run the Zimbra Collaboration Server Open Source Edition (OSE). We have previously upgraded through the 7.1 and 7.2 series with no issues. This is a brief overview of what needed to happen to get from 7.2.0 -> 8.0.0 on my CentOS 64-bit test server. I will take the production system from 7.2.1 -> 8.0.0 after a couple of weeks of random testing. I'm not crazy enough to just put a dot0 version in production. I may even wait a month to make sure enough bugs are worked through. I do have a job I want to keep ;)

Naturally, one should start by reading the very informative Zimbra 8.0.0 GA Release Release Notes. I am glad to see the "Inline reply", "Autocomplete matches now work correctly for Contact Groups" bugs fixed! The "Per folder message retention policy creation" added is long overdue IMHO. Don't short change your upgrade by skipping the release notes. You *should* take the time to go through it!


As root:
screen
tar -xzvf zcs-8.0.0_GA_5434.RHEL6_64.20120907144639.tgz
cd zcs-8.0.0_GA_5434.RHEL6_64.20120907144639
./install.sh --platform-override

To get the new 5 year default SSL cert, you will want to run as user zimbra:
sudo /opt/zimbra/bin/zmcertmgr createca -new
sudo /opt/zimbra/bin/zmcertmgr deployca
sudo /opt/zimbra/bin/zmcertmgr deploycrt self

Production server upgrade note (10/29/2012):
The Zimbra 8.0.0 upgrade/install seems to have reset several of my custom settings to default attributes! I have made most of my custom changes based on the very handy Zimbra wiki for Performance Tuning Guidelines for Large Deployments in the past. The main changed items I've spotted so far are zimbraImapMaxConnections and zimbraImapNumThreads that reverted back to 200. I hope not to find too many more production system oddities! The reason I noticed the issue is that the /opt/zimbra/log/mailbox.log had MANY messages like:
WARN  [ImapServer-76] [] imap - Dropping connection (max connections exceeded)
WARN  [ImapServer-80] [] imap - Dropping connection (max connections exceeded)

Wednesday, September 26, 2012

Adobe Acrobat Reader 64-bit CentOS (RHEL or SL) linux LDAP problem

Let me start by saying, "Shame on you Adobe!" for not recognizing an opportunity to continue in the Linux OS realm in a meaningful way... I already use Evince more for PDF files now anyway. No more real Flash support is just another nail in the coffin.

Here's the deal; Adobe doesn't have a 64-bit Acrobat Readear (acroread). So, when you need to install the 32-bit version you get only some of the 32-bit stuff gets installed. More may actually be needed. This is especially true if you have LDAP (openldap) at the center of the authentication realm. You will end up with a message like:
GLib-WARNING **: getpwuid_r(): failed due to unknown user id
As user root, you will need to run:
yum -y install nss-pam-ldapd.i686

Friday, July 27, 2012

OMSA 7.0 firmware update issue or holdover public key problem from 2010? 

Updated Dell's OMSA from 6.5.1 to 7.0 via  standard yum process. Checked for any new goodies via "yum install $(bootstrap_firmware)". Tried to update firmware, but failed:
# update_firmware  --yes
Running system inventory...
Searching storage directory for available BIOS updates...
Checking BIOS - 6.1.0
Available: dell_dup_componentid_00159 - 6.1.0
Did not find a newer package to install that meets all installation checks.
Checking SAS/SATA Backplane 0:0 Backplane Firmware - 1.07
Available: dell_dup_componentid_11204 - 1.07
Did not find a newer package to install that meets all installation checks.
Checking PERC 6/i Integrated Controller 0 Firmware - 6.3.1-0003
Available: pci_firmware(ven_0x1000_dev_0x0060_subven_0x1028_subdev_0x1f0c) - 6.3.1-0003
Did not find a newer package to install that meets all installation checks.
Checking OS Drivers - 0
Available: dell_dup_componentid_18981 - 7.0.0.4
Found Update: dell_dup_componentid_18981 - 7.0.0.4
Checking Dell Lifecycle Controller - 1.5.1.57
Available: dell_dup_componentid_18980 - 1.5.2.32
Found Update: dell_dup_componentid_18980 - 1.5.2.32
Checking NetXtreme II BCM5709 Gigabit Ethernet rev 20 (eth1) - 6.2.16
Available: pci_firmware(ven_0x14e4_dev_0x1639) - 6.2.16
Available: pci_firmware(ven_0x14e4_dev_0x1639_subven_0x1028_subdev_0x0235) - 7.0.47
Found Update: pci_firmware(ven_0x14e4_dev_0x1639_subven_0x1028_subdev_0x0235) - 7.0.47
Checking NetXtreme II BCM5709 Gigabit Ethernet rev 20 (eth0) - 6.2.16
Available: pci_firmware(ven_0x14e4_dev_0x1639) - 6.2.16
Available: pci_firmware(ven_0x14e4_dev_0x1639_subven_0x1028_subdev_0x0235) - 7.0.47
Found Update: pci_firmware(ven_0x14e4_dev_0x1639_subven_0x1028_subdev_0x0235) - 7.0.47
Checking ST3450857SS Firmware - es65
Available: dell_dup_componentid_20795 - es65
Did not find a newer package to install that meets all installation checks.
Checking iDRAC6 - 1.80
Available: dell_dup_componentid_20137 - 1.85
Found Update: dell_dup_componentid_20137 - 1.85
Checking NetXtreme II BCM5709 Gigabit Ethernet rev 20 (eth2) - 6.2.16
Available: pci_firmware(ven_0x14e4_dev_0x1639) - 6.2.16
Available: pci_firmware(ven_0x14e4_dev_0x1639_subven_0x1028_subdev_0x0235) - 7.0.47
Found Update: pci_firmware(ven_0x14e4_dev_0x1639_subven_0x1028_subdev_0x0235) - 7.0.47
Checking NetXtreme II BCM5709 Gigabit Ethernet rev 20 (eth3) - 6.2.16
Available: pci_firmware(ven_0x14e4_dev_0x1639) - 6.2.16
Available: pci_firmware(ven_0x14e4_dev_0x1639_subven_0x1028_subdev_0x0235) - 7.0.47
Found Update: pci_firmware(ven_0x14e4_dev_0x1639_subven_0x1028_subdev_0x0235) - 7.0.47
Checking Dell 32 Bit Diagnostics - 5154a0
Available: dell_dup_componentid_00196 - 5154a0
Did not find a newer package to install that meets all installation checks.
Checking System BIOS for PowerEdge R710 - 6.1.0
Available: system_bios(ven_0x1028_dev_0x0235) - 3.0.0
Did not find a newer package to install that meets all installation checks.
Found firmware which needs to be updated.
Running updates...
/ Installing dell_dup_componentid_18981 - 7.0.0.4Installation failed for package: dell_dup_componentid_18981 - 7.0.0.4
aborting update...
The error message from the low-level command was:
Update Failure: Partition Failure - The Delete Dynamic Partition has failed
Tried the /etc/redhat-release fix without success. Tried a reboot to flush out any oddities...

After much google'n it seems that I had some kind of public key issue:
rpm --import http://linux.dell.com/files/libsmbios/download/RPM-GPG-KEY-libsmbios
rpm --import http://lists.us.dell.com/linux-security-publickey.txt
Now update_firmware works again as expected.

Thursday, June 21, 2012

"DEFROUTE" in RHEL, CentOS or Fedora - a usage case for eth0

Here is the situation: There is a user with a remote office that includes networking equipment like printers, backup server etc. He uses a company provided CentOS laptop as the gateway for his network via a cell card since there is no other cheaper option available to get him connected. He travels with the laptop often and I don't need access to the equipment at his office unless he's there. The user always connects either via WIFI or a cell card for VPN connection depending on what is available. The laptop is running openvpn and is connecting to our company's openvpn server. No problem... until I want to also connect the laptops ethernet cable and use NetworkManager and use a DHCP server for the eth0... That's when the VPN drops and the laptop now has an incorrect default route. What's odd is that order of interface startup does not matter... dhcp on eth0 wins no matter what... bummer.


What's happening? Well, normally with DHCP, the client is given a default route as part of the information exchange. That eth0 default route takes over. It's just that simple... unless you give the networking system guidance on what to do in the form of the "DEFROUTE" option. The option has been around for a long time. The current Red Hat Enterprise Linux 6 Deployment Guide has DEFROUTE option hidden in the 8.2.4. Dialup Interfaces section. Here is a chunk of the information from the guide:
DEFROUTE=answer
where answer is one of the following:
  • yes — Set this interface as the default route.
  • no — Do not set this interface as the default route.         

In the past, I did not use the DEFROUTE option. I found that I could just statically assign the eth0 and *not* let NetworkManager have access to it (NM_CONTROLLED=no). In fact with Centos (and the like), NM seems to get disabled as a generally rule.

Also, if this was a server or I wanted to statically assign the interface, it would not be an issue. Just one of those fringe usage cases.

Thursday, June 14, 2012

LTSP 5.2.x rsh server on client install, setup and HOWTO

Don't start with the, "rsh is bad..." message. I know, I know! It's an internal test network and was just easy to do for remote client checking. Besides, the "ltsp-localapps" only works for the logged in user and does not allow for arbitrary root user interaction with the client. If there is a built-in way to do this, let me know. At some point, I may try sshd client setup.

I am using CentOS 6.x as the server OS and customize the client build to be CentOS 6.x also. LTSP 5.2 is the software from k12linux at fedorahostedI don't think that affects the directions below in any way, however. And if this looks like part of a script, you would be correct.

Change the LTS_HOME variable to your own LTSP client build location on the server as required:
export LTS_HOME="/opt/ltsp/i386"

Check to make sure rsh is allowed in securetty for the client:
grep -q "^rsh" $LTS_HOME/etc/securetty && echo rsh >> $LTS_HOME/etc/securetty

Get rsh-server installed into you chroot'd environment:
Option 1 (re)creates the client build to have rsh-server instaled and includes future builds:
edit the "/etc/ltsp/kickstart/Fedora/common/release/el6.ks" and add "rsh-server" *before* the "%end" line. Then (re)run the ltsp-build-client and ltsp-server-tweaks as if a new install:
ltsp-build-client 2>&1 |tee /tmp/ltsp-build-client.out-`date +%Y%m%d%H%M`
cd $LTS_HOME
setarch i386 chroot .
chkconfig rsh on
ltsp-server-tweaks

Option 2 install and setup the rsh-server for this client build only:
cd $LTS_HOME
setarch i386 chroot .
mount -t proc proc /proc
#set proxy if needed
yum install rsh-server
chkconfig rsh on
umount /proc

Get the clients /root to be based on the $LTS_HOME/root from the server and not a tmpfs by commenting the "/root" line of k12linux.rwtab:
sed -i 's/^empty[[:space:]]\/root/#empty\t\/root/'$LTS_HOME/etc/rwtab.d/k12linux.rwtab
OR for you perl peeps
perl -p -i -e "s/^empty\t\/root/\#empty\t\/root/g" $LTS_HOME/etc/rwtab.d/k12linux.rwtab

Note: To safeguard your custom options from accidental rpm update overwrites, please consider creating your own blah.ks file to be referenced in /etc/ltsp/ltsp-build-client.conf.

Properly create a .rhosts file for the clients root user. This script chunk assumes the primary (eth0) interface is the interface that communicates with the clients. If your primary server interface is not the interface for client connection, you will need to add/modify the client's .rhosts file accordingly:
echo "server-`hostname --ip` root" >> $LTS_HOME/root/.rhosts echo "rsh" >> $LTS_HOME/etc/securetty chmod 600  $LTS_HOME/root/.rhosts

Now boot the client and test an rsh command from the server to the client. If you have issues, you will want to add a "shell" option for the client in the correct lts.conf then reboot the client. For i386 arch, the file is "/var/lib/tftpboot/ltsp/i386/lts.conf". This will give you a chance to see the /var/log/messages file if you have not setup remote logging for the client.

To make a custom PXE boot logo change, create/modify a theme run the following command from within the chroot:
ltsp-rewrap-latest-kernel

To apply a new theme
Create a new plymouth theme. You can do this by making simple variations on the stock theme by taking a copy of the default theme using the procedure below. You can replace "newtheme" in the commands below with whatever name you want to give the new theme. This procedure assumes the chroot is in the /opt/ltsp/i386 directory.
Start by copying the folder with this command:

cp -a /opt/ltsp/i386/usr/share/plymouth/themes/solar /opt/ltsp/i386/usr/share/plymouth/themes/newtheme

Now modify "newtheme" as appropriate.  First go into the new theme 
directory by typing:
cd /opt/ltsp/i386/usr/share/plymouth/themes/newtheme

Then rename the .plymouth file by running:

mv rings.plymouth newtheme.plymouth

Edit the .plymouth file and change:

Name=Rings

to:

Name=Newtheme

and change:

ImageDir=/usr/share/plymouth/themes/rings

to

ImageDir=/usr/share/plymouth/themes/newtheme

You may also want to change the background colors. BackgroundStartColor is the color at the top of the screen and BackgroundEndColor is the color at the bottom of the screen. Plymouth will make a gradient of these colors across the screen. For example to make the background change from white to black change the lines:
BackgroundStartColor=0x080808
BackgroundEndColor=0x080808

to:

BackgroundStartColor=0xffffff
BackgroundEndColor=0x000000

When finished making changes save the file.

Next replace the image file named header-image.png with the desired replacement. Do not change the name of this file!

The exact size does not seem to matter as the plymouth will center it in 
the screen above the animated "rings".
You can also get fancy and replace all the other progress images also.

Chroot to the client directory by running:

chroot /opt/ltsp/i386

Activate the new theme with this command:

plymouth-set-default-theme newtheme

Note: you may get an error from sed (ex: sed: warning: failed to set default file creation context to unconfined_u:object_r:usr_t:s0: No such file or directory). This does not seem to cause problems.
Build a new initramfs file with the new theme:

ltsp-rewrap-latest-kernel

Exit the chroot by typing:

exit

and update the tftp directory with the new initramfs by typing:

ltsp-update-kernels

If you use NBD you will also need to run:

ltsp-update-image

Now fire up a client and enjoy the new theme!

Thursday, March 22, 2012

CentOS 6.2 BCM4312 working wifi howto

Linux on laptops has come a LONG way over the years. I am happy to say that most Linux installs for laptops go with very little or no issues. Recently decided to install CentOS 6 (but I'm sure this applies to RHEL 6 or SL6) on an otherwise decent Dell D630 laptop. My only issue was wifi not working out of the box. The "issue" seems to be mostly about the BCM4312 802.11 card in the laptop. Here is the easy fix:

1. Get the "updated" el6 b43-firmware rpm from the Russian Fedora guys. (make sure it's the *el6* version)
 
wget "http://koji.russianfedora.ru/koji/buildinfo?buildID=1041"

2. Install it (current version depreciates the b43-openfwwf package nicely)
yum install b43-firmware-5.10.56.27.3-2.el6.noarch.rpm

3. Wait several seconds and the wifi light comes on and wifi works!

I originally tried with the documented b43-fwcutter -w "$FIRMWARE_INSTALL_DIR" broadcom-wl-5.100.138/linux/wl_apsta.o but failed to extract the firmware needed.

I also looked into the kmod-compat-wireless but current information suggest, "RHEL6 packages are broken at present". Enjoy.

Here is all of the info from the BCM4312 card in question:

lspci | grep BCM
0c:00.0 Network controller: Broadcom Corporation BCM4312 802.11b/g LP-PHY (rev 01)

lspci -n | grep 14e4
0c:00.0 0280: 14e4:4315 (rev 01)

Original /var/log/messages indicated:
b43-phy0 ERROR: Firmware file "b43/ucode15.fw" not found
b43-phy0 ERROR: Firmware file "b43-open/ucode15.fw" not found
b43-phy0 ERROR: You must go to http://wireless.kernel.org/en/users/...devicefirmware and download the correct firmware for this driver version. Please carefully read all instructions on this website.

Sunday, March 18, 2012

Google Music Manger issue with .ogg file?

Had a very head scratching issue with the (at least the) Linux version of Goggle Music Manger. GMM claims to have uploaded all of the songs and produced some errors on some individual song titles. I didn't think much of the errors since the upload showed successful. I then went to the Google Play page to take the next step of creating some play lists. To my surprise, I only had the original group of files I uploaded a while back and the recently purchased songs from Google (practically a) give-way of albums from last week. I went back to look at the errors noted by Google Music Manager and deleted from disk the files that were named in the errors. I was left with a single error from the "Run Troubleshooter" option; and the error listed that had no filename and a error with just "Failed to upload". Kinda odd to find no filename... Finally noticed that after hitting "Apply" and "Ok" I saw a "0%" on a Al DiMeola song and went searching for it. Immediately after moving the file from the original disk location on my system, Google Music Manger had a little green icon turn on and Google Play began to see the songs. That Al DiMeola song was an otherwise legit and playable .ogg file. I can only suspect that GMM does not like OGG files at this point, but doesn't want to ignore them. Hope my pain is your gain with Google Music Manager.

Tuesday, March 6, 2012

Dell Server Update Utility (SUU) v6.5.3 64-bit CentOS/RHEL 6 problems

Just going to vent here for a minute, so stay with me...Why? Why would you have so many 32bit dependencies when running SUU on a 64bit OS. I mean Dell has already shown that OMSA for 32bit is not going to happen going forward. At least fix your own documentation for requirements... please.

So, to get SUU 6.5.3 functional on a 64bit CentOS 6.2 or RHEL 6.x server (and SL I bet), you *will* need to:

yum install pam.i686 libXtst.i686 libXext.i686 compat-libstdc++-33.i686 pam.i686
As noted in the comments by Carlos Capriotti, if you want to run the GUI stuff, you will need a couple more packages:
yum install ncurses-libs.i686 libXp.i686

Friday, February 24, 2012

Verizon pc770 wireless card setup on CentOS 6.x

It's a very good time in a Linux lovers life when you can just say, "it works"... Because of all of the hard work of countless volunteers (and/or paid professionals). I am pleased to announce that the crappy unount of the virtual CD ROM is no longer needed in CentOS 6.x (or SL 6, RedHat 6)!

Thank You!

1. Plug in the card
2. Select the provider
3. Follow the prompts
4. Activate the card

NICE. It just WORKS!

P.S. Sorry about the situation for CentOS 5.x, but it's, "doable".

CentOS 6.x VMware Workstation 7.1 installation issue solved.

As this writing, VMware-Workstation 7.1 has issues building vmmon on CentOS 6.2 and therefore SL 6 and RHEL 6 also. After some head scratching, google'n and lots of reading, here is the easy way to get up and running.

This install example is for VMware-Workstation-7.1.5-491717.i386.bundle at the very least. Download that from VMware as you would normally.

First, make sure you have booted to the most recent kernel before installing. Otherwise you will not be able to build the VMware modules against the kernel you are running.

First, make sure to have some basic prerequisites before you start:
yum install gcc gcc-c++ kernel-headers kernel-devel


Next install (or update) the VMware-Workstation bundle as root and valid $DISPLAY set:
bash VMware-Workstation-7.1.5-491717.i386.bundle
Follow the promps as usual.

Bummer, vmmon won't load and produces errors in /var/log/messages like:
kernel: vmmon: disagrees about version of symbol smp_ops
kernel: vmmon: Unknown symbol smp_ops


First attempt at a work around yields the ever helpful Akemi Yag (aka "toracat")  blog and the perfect *helpful* comment by NomadAU. Why is that Redhat Bugzilla entry closed anyway??


Here is the portion that is key to fixing the issue; as root:
mv /usr/lib/vmware/modules/binary/bld-2.6.32-*-rhel6 ~/

Finally run:
vmware-modconfig --console --install-all

Tuesday, February 7, 2012

How to get system-config-netboot working on CentOS 6, RHEL 6 or SL 6

Sadly, Redhat has decided to drop system-config-netboot from it's offerings for RHEL 6. I was very much accustomed to the simplicity of using system-config-netboot for PXE boot client installs. Redhat may have not included the packages to install system-config-netboot, but it is certainly easy to get running on your RHEL 6 or clone. Here is the CentOS 6 i386example (please run commands as root or sudo you guts out):

1. Make sure some pre-requisites are in place:
yum install tftp-server xinetd pygtk2-libglade gnome-python2-canvas

2. Adjust for your arch type: Download the latest CentOS 5.x system-config-netboot* and alchemist* versions:
wget http://mirrors.kernel.org/centos/5/os/i386/CentOS/system-config-netboot-0.1.45.1-3.el5.noarch.rpm wget http://mirrors.kernel.org/centos/5/os/i386/CentOS/system-config-netboot-cmd-0.1.45.1-3.el5.noarch.rpm wget http://mirrors.kernel.org/centos/5/os/i386/CentOS/alchemist-1.0.36-2.el5.i386.rpm

3. Force the install of the above packages:
rpm -ihv --force --nodeps system-config-netboot-* alchemist-1.0.36-2.el5.i386.rpm

4. Move part of the installed alchemist package to the correct place... bad administrator! ;)
mv /usr/lib/python2.4/site-packages/* /usr/lib/python2.6/site-packages/

Running "system-config-netboot" through some warning message at me, but it did what I wanted it to do

Yeah, it's a bit hackish. I'm OK with it if you are. You *could* rebuild the source rpm for each of them correcting the the alchemist path etc. I will for my systems, but this is the "easy" version of the "How to get system-config-netboot working on CentOS 6, RHEL 6 or SL 6" after all...

Thursday, November 10, 2011

Howto get network card vendor, device or kernel module from the /proc and/or /sys filesystem

Work in progress - place to keep notes to myself - may help someone else - cheat sheet kinda page ;)

1. How to get NIC/network card vendor information (scripted example)

for i in `ls -d /sys/class/net/eth*` do   ETH="`basename $i`"   echo -n "$ETH "   NICID="`cat /sys/class/net/$ETH/device/vendor|cut -c3-`"   grep "^$NICID" /usr/share/hwdata/pci.ids done
2. How to get the NIC/network card MAC address (simple example)
cat /sys/class/net/eth0/address
3. How to get the NIC/network kernel module and PCI device info (DETAILS). This can also derive the vendor and device info like above (simple example)
VENDOR="`cat /sys/class/net/eth0/device/modalias |cut -c6-13`" DEVICE="`cat /sys/class/net/eth0/device/modalias |cut -c15-22`" grep -i $VENDOR /lib/modules/`uname -r`/modules.alias | grep -i $DEVICE
OR generally
grep `cat /sys/class/net/eth0/device/modalias |cut -c-22` /lib/modules/`uname -r`/modules.alias
External important links for PCI or kernel module information for Linux:
http://www.pcidatabase.com/

4. How to find the WWN for a SAS end device (the arrary for example) card on RHEL 6, CentOS 6 or similar (simple example)
cat /sys/class/sas_device/*/sas_address
5. How to find the WWN for a SAS card on RHEL 6, CentOS 6 or similar (simple example)
cat /sys/class/sas_phy/*/sas_address

OpenGTS client connection test with gps2opengts-free

WORK IN PROGRESS!!!

Just recently started playing setting up a GPS tracking server. Here is a follow up client connection on my Android phone with the free version of  gps2opengts. Here are some (incomplete) notes so far.

I hope you can at least find and install the gps2opengts-free on your own. I will skip that ;)
I will leave it up to you to figure out how to tunnel/port forward through your firewall as required.

OpenGTS server config change for "GPRMC" type of connections based on info from HERE.
Edit /var/lib/tomcat6/webapps/track/WEB-INF/webapp.conf and uncomment the the next 2 lines from the "# --- GPRMC properties" section:

gprmc.parm.account=acct
gprmc.parm.device=dev

Rebuild and deploy the tomcat container as noted from my server setup page:
ant all
ant track.deploy
ant gprmc.deploy

(re)Start tomcat:
service tomcat6 restart

OpenGTS web based vehicle setup for gps2opengts-free (should also work with GPS2OpenGTS_Pro):
1. Log into your OpenGTS server as a user "demo" (just playing with the demo install at this point!). 
1. From the "Main Menu" -> "Administration" tab -> "Vehicle Admin" -> create a new "Vehicle ID" of "test01".
2. From the "View/Edit Vehicle Information" section -> select the new vehicle and then "Edit" button.
3. "Unique ID" is required and will be the "test01" that is the only option for the free client gps2opengts-free. Otherwise add info to as many fields as you know/want. Make sure this vehicle is also "Active" = "Yes" and hit the "Change" button to save.

gps2opengts-free android app client setup:
I hope to document this tonight...

Note: As part of the frustration of initial install, I needed a little help from tcpdump to help figure out what was/was not happening. Again, my lack of tomcat knowledge was the reason for my issues:
tcpdump port 8080 -vvvvvv and not host THE_HOST_YOU_MAY_HAVE_SSHd_FROM

Note: I was hoping to find a handy to use wget to make local connection attempts. The assumption is that you are connecting via the "demo" default account like:
wget --post-data='/gprmc/Data?acct=demo&dev=test01&gprmc=$GPRMC,172413,A,3848.8028,N,08957.3521,W,0,000.0,171111,,*16' http://localhost:8080
But I have been unable to get this kinda thing to work. Wireshark shows the wget doing an http/1.0 post that is different that the gps2opengts_free http/1.1 post :(

Log information can be gotten from the /var/log/tomcat6/catalina.out  $GTS_HOME/logs/w-gprmc.log $GTS_HOME/logs/TrackWar.log or any other file in the $GTS_HOME/log/ directory.

Friday, October 28, 2011

CentOS 6.0 OpenGTS 2.3.8 install and demo setup howto

This is the quick install and setup for OpenGTS and CentOS 6.0.  OpenGTS is a general GPS tracking software for many types of devices. There is also a commercial version.
There are some details missing, but the jist of what needs to happen is here.

*Please keep in mind that I live VERY near St. Louis and was writing this during the World Series Championship game 6 and game 7! I've been distracted to say the least ;)

OpenGTS Config
manual is the REAL source for what needs to be done, but here are the steps for CentOS 6.0 with a little strategy difference (I wanted to use the CentOS provided version of most everything).

If you want to use the "real" java SDK, fine, download it from HERE and change the rest of the java install accordingly:
yum install ant mysql-connector-java java-1.6.0-openjdk tomcat6 apache-tomcat-apis httpd classpathx-mail cd /opt wget "http://sourceforge.net/projects/opengts/files/server-base/2.3.8/OpenGTS_2.3.8.zip/download" unzip OpenGTS_2.3.8.zip ln -s OpenGTS_2.3.8 OpenGTS

Create environment file
cat >> /etc/profile.d/opengts.sh << EOF #The Java JDK (NOT the JRE) installation directory. #export JAVA_HOME=/usr/java/latest export JAVA_HOME=/usr/lib/jvm/java-1.6.0-openjdk-1.6.0.0.x86_64 #The Apache Ant installation directory. #export ANT_HOME=/usr/lib64/gcj/ant #The Apache Tomcat installation directory. export CATALINA_HOME=/usr/share/tomcat6 #The OpenGTS installation directory. export GTS_HOME=/opt/OpenGTS EOF . /etc/profile.d/opengts.sh

If you don't want to use the "classpathx-mail" javamail.jar you can download the mail.jar from Oracle or  here:
unzip javamail1_4_4.zip cp -p ~/javamail-1.4.4/mail.jar $JAVA_HOME/jre/lib/ext/
OR just use the one installed:
ln -s /usr/share/java/javamail.jar $JAVA_HOME/jre/lib/ext/

Here are a couple of symlinks that help out:
mkdir /usr/share/tomcat6/common/lib cd /usr/share/tomcat6/common/lib ln -s /usr/share/java/tomcat6-servlet-2.5-api-6.0.24.jar servlet-api.jar ln -s /usr/share/java/mysql-connector-java-5.1.12.jar $JAVA_HOME/jre/lib/ext/

The real meat of the install of the java stuff:
cd $GTS_HOME ant all ant track.war ant track.deploy

A couple of housekeeping commands to silence warnings/errors before running the checkInstall.sh:
ln -s $JAVA_HOME java ln -s $CATALINA_HOME tomcat ln -s $GTS_HOME gts $GTS_HOME/bin/checkInstall.sh

Correct issue noted from the checkinstall script.

Initialize the database and get the demo stuff up and going:
service mysqld restart service tomcat6 restart echo "create database demo;"|mysql $GTS_HOME/bin/initdb.sh -rootUser=root -rootPass= $GTS_HOME/bin/admin.pl  Account -account=demo -nopass -create $GTS_HOME/bin/admin.pl  Device -account=demo -device=demo  -create $GTS_HOME/bin/admin.pl  Device -account=demo -device=demo2 -create $GTS_HOME/bin/dbAdmin.pl   -load=EventData -dir=./sampleData

Look at $GTS_HOME/logs/TrackWar.log or /var/log/tomcat6/catalina.2011-10-26.log for issues.

Next part will be connecting a real test client to this server... coming soon!

http://www.opengts.org/FAQ.html
http://wiki.osgeo.org/wiki/Enterprise_Linux_GIS#RHEL.2FCentOS.2FSL_6_:_Packages_Status_Summary

Wednesday, October 19, 2011

CentOS 6.x Mythtv 0.24 plus Hauppauge PVR-500 setup hotwo

Let me start by stating that getting this setup to be functional was a frustrating experience. Mostly due to my lack of Mythtv setup experience. It's not to say that I have not been using Mythtv for a very long time. It's more along the lines that I run the boxes for sooooo long without issue and therefore don't have to deal with setup very often. The box I'm replacing was a venerable CentOS 5 setup with a single Hauppauge PVR-250. The other issue is that I introduced some new-to-me equipment (the PVR-500) and most found documentation did not directly pertain to the mythtv-0.24 version.

Basic CentOS 6.0 32bit is documented in a previous post. This will be more about the setup of the Hauppauge PVR-500 since that was really the only problem.

There is some some information in the Mythtv wiki that is helpful.

Please keep in mind that my main intent is to show the PVR-500 setup and not all
the easy other stuff.

Step 1: run mythtvsetup
Step 2: select "Capture cards" -> "New capture card"

Step 3: from "Card type:" select "H.264 encoder card (HD-PVR)" then "Finish"

Step 4: select "New capture card" -> "Card type:" select "H.264 encoder card (HD-PVR)" again. This time change "Video device:" to "/dev/video1" then "Finish"

Step 5: add your "Video source" and "Input connections" and follow any other instructions you have ;)


Error messages I had while trying to get the PVR-500 setup correctly:
snd_pcm_open_noupdate unknown pcm default
Error: Failed to open audio device ALSA:default
Encountered problems running /usr/bin/mythpreviewgen

Note: vlc error:
*** glibc detected *** vlc: free(): invalid pointer:
 Solution was simple for this 32bit install, as root:
mv /usr/lib/vlc/plugins/meta_engine/libtaglib_plugin.so ~/libtaglib_plugin.so-vlc-issue

Google Music Manager native Linux client install and review

To Google's credit they have quickly moved to a native Linux client with their beta Music Manager, The "google-musicmanager-beta-1.0.18.6104-0.i386" was built on September 14 and made available on September 24 2011. The initial Music Manager was built on wine like some other notable Google products (like Picasa). The Linux version of the Music Manager is now native! And since there is no bundled wine the install size is a very modest 9.5MBish.

I am running this test on CentOS 6.0(CR). Other choices for downloads is available from HERE or by going to your "ADD MUSIC" option toward the top right of the music.google.com screen after Google login. Google has downloads for Debian/Ubuntu and for Fedora/openSUSE in both 32bit and 64bit:
As root install your download. For my CentOS box I did:
yum install google-musicmanager-beta-1.0.18.6104-0.i386

 You can run the program from the command line by just typing  at your GUI prompt:
google-musicmanager

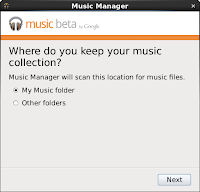
To run the Linux Google Music Manager from the Gnome desktop, just select "Applications" -> "Internet" -> "Google Music Manager". You will be greeted with this start sequence:


Here is a screenshot of the "About" for this installed version:

Here is a screenshot of the Gnome panel view of the running Music Manager:


Firefox seems well supported for Google Music when you have Flash installed:

Wednesday, October 12, 2011

CentOS 6.x Mythtv 0.24 install and setup hotwo

This is originally created with CentOS 6.0. Prior to the release of CentOS 6.1, I strongly urge all admin's to use the CentOS 6.0 CR Updates to enhance the security of your system. Also, my CentOS Mythtv server was a  "Desktop" install option for this example. I have cable TV and have used both the Hauppauge PVR-250 and now the Hauppauge PVR-500 since my needs are basic.

UPDATE: I have the PVR-500 CentOS 6 setup info with pictures for mythtv 0.24 now.

Get the security related updates first:
rpm -ihv /home/pj/Downloads/centos-release-cr-6-0.el6.centos.i686.rpm yum update

Install both EPEL and RPMFORGE repositories and please remember to also install *AND* setup either priorities or protectbase yum plugins.
rpm -ihv http://dl.atrpms.net/all/atrpms-repo-6-4.el6.i686.rpm rpm -ihv http://download.fedora.redhat.com/pub/epel/6/i386/epel-release-6-5.noarch.rpm yum install yum-plugin-priorities


Do these error messages look familiar?
 --> Processing Conflict: 1:qt47-x11-4.7.2-1_18.el6.i686 conflicts qt-x11 < 1:4.7.2-1_18.el6
--> Processing Conflict: 1:qt47-x11-4.7.2-1_18.el6.i686 conflicts qt4-x11 < 1:4.7.2-1_18.el6
--> Processing Conflict: 1:qt47-x11-4.7.2-1_18.el6.i686 conflicts phonon < 4.3.80-1
Error: qt47-x11 conflicts with qt-x11

OR
file /usr/share/man/man3/XML::SAX::Base.3pm.gz conflicts between attempted installs of perl-XML-SAX-Base-1.04-3.el6.noarch and perl-XML-SAX-0.96-7.el6.noarch
file /usr/share/man/man3/XML::SAX::Exception.3pm.gz conflicts between attempted installs of perl-XML-SAX-Base-1.04-3.el6.noarch and perl-XML-SAX-0.96-7.el6.noarch

Clean out the older/problem bits:
yum remove qt-x11 qt phonon perl-XML-SAX-Base

Install the initial problem packages:
yum install qt47 qt47-x11 qt47-webkit qt47-mysql --enablerepo=atrpms-testing


The big download and install:
yum install mythtv --enablerepo=atrpms-testing --exclude=perl-XML-SAX-Base

Make sure mysqld and mythbackend on going to try and start on boot
chkconfig mythbackend on mysqld on

You really need to read through the mythtv-HOWTO or even Installing MythTV on RHEL/CentOS

I'm migrating from CentOS 5.7 -> 6.0 following normal backup and restore steps:
service mysqld start mysql < /usr/share/doc/mythtv-docs-0.24.1/database/mc.sql


A new simple no-security-just-get-it-running setup could include:
echo 'grant all on mythconverg.* to mythtv@"%" identified by "mythtv";' |mysql mythconverg echo 'flush privileges;'|mysql mythconverg mythtv-setupp


Again, you really need to read through the mythtv-HOWTO or even Installing MythTV on RHEL/CentOS for your specific tuner card.

http://www.gossamer-threads.com/lists/atrpms/users/15601

Monday, October 10, 2011

Dell printer firmware update stupidity and howto

Not sure why Dell is taking recent steps backwards with regard to Linux support, but clearly it is. The recent BIOS update issues have given way to printer update utilities that are not Linux install friendly. The most recent example is the otherwise decent Dell 2555dn MFP. The previous A02 version of the firmware (DELL_2355DN-MONO-LASER-MFP_A02_R302331.exe) was just a self-extracting zip file. So a simple
unzip DELL_2355DN-MONO-LASER-MFP_A02_R302331.exe
would provide me with the needed "*.hd" (Dell2355dn_A02_v2.70.03.06.hd in this case) firmware file to load via the update firmware web page.
Now Dell seems to add in their install/extractor utility like the general Windows driver files have... and it takes some extra effort.

My current system/admin setup is based on CentOS 6.x but any recent distro will likely be very close. I'm going to assume that you have already downloaded the file and you are at a command/terminal prompt.

1. Install wine as root
yum install wine cabextract

2. As a normal user get winetricks and install "vcrun6"
wget http://winetricks.org/winetricks chmod +x winetricks ./winetricks vcrun6


3. As a normal user run the installer like and just exit after the GUI comes up
wine Dell2355dn_A03_2.70.03.08.exe

4. After you should be able to find the needed *.hd file in "~/.wine/drive_c/users/YOUR_USERNAME/Temp/". For this example, it was "~/.wine/drive_c/users/pj/Temp/Dell2355dn_A03_2.70.03.08.hd"

Possible error messages:
If you don't have the VBRUN 6 installed (vcrun6) you will get an error like:
err:module:import_dll Library MFC42.DLL (which is needed by L BLAHBLAH) not found
err:module:LdrInitializeThunk Main exe initialization for L BLAHBLAH failed, status c0000135

Friday, September 30, 2011

CentOS 6 lpadmin generic postscript printer addition

It really took a while for me to figure out how to add printers via the command line using lpadmin on CentOS 6. So, this information also will apply to newer Fedora users as well as RHEL 6 users:

For generic LPD/LPR Postscript print server:
lpadmin -p printer_name -m drv:///sample.drv/generic.ppd -v lpd://your_print_server/raw1 -D "Your printer description" -L "Your printer location" -o printer-error-policy=retry-job -o printer-is-shared=false -E


For generic LPD/LPR PCL print server:
lpadmin -p printer_name -m drv:///sample.drv/generpcl.ppd -v lpd://your_print_server/raw1 -D "Your printer description" -L "Your printer location" -o printer-error-policy=retry-job -o printer-is-shared=false -E

For Jetdirect/RAW print servers
lpadmin -p printer_name -m drv:///sample.drv/generic.ppd -v socket://your_print_server:9100 -D "Your printer description" -L "Your printer location" -o printer-error-policy=retry-job -o printer-is-shared=false -E

The new part is "drv:///sample.drv/generic.ppd" as the model instead of "postscript.ppd.gz" or similar from the past. This seems to trigger a ppd file build from the script/file of "/usr/share/cups/drv/sample.drv" as part of the cups package.

Notes:
I don't like the default option of not retrying failed jobs. It's a dumb default IMHO! The "-o printer-error-policy=retry-job" is a better choice.

I also tend to turn off sharing as a general rule. You may want it on, however. The "-o printer-is-shared=false" turns off printer sharing.

The Jetdirect/RAW printer socket can change for print servers with multiple ports. First port is 9100, second is 9101 etc. The same kinda process exists for the LPD/LPR print server where "raw1" will increment for printer port as a generic rule.

Saturday, September 17, 2011

CentOS 6.0 Zimbra 7.1.2 Open Source Edition misc setup notes

This not a formal information page... it is a free form of helpful Zimbra bits of information that I needed in order setup a Zimbra server. This Zimbra setup has a seperate openldap server as the authentication server. The ldap specific stuff has been removed. We were moving from a VERY distributed mail setup. Each of the 40 plus remote sites is a mail destination, each with it's own mail server (postfix) and IMAP (dovecot) setup.

#to set env variables needed by zimbra provided services
. ~/bin/zmshutil ; zmsetvars

#sets zimbra to listen in https mode restart of zimbra needed (as zimbra)
zmtlsctl https

#set max upload imap size to 30MB (as zimbra)
zmprov mcf zimbraFileUploadMaxSize 30000000

#to get the zimbraID COS "class of service" (as zimbra)
zmprov gc Default |grep zimbraId:

#this will let all your users login with just the first part of their e-mail address (as zimbra)
zmprov mcf zimbraDefaultDomainName YOURDOMAIN.WHATEVER

#set up bulk add from host with authentication connection for users
getent passwd | egrep -v "thing1|thing2|:x:|:\*:" | sort -t : -k 3g,3 > /tmp/ldapinfo.txt perl zimbra-passwd2zmprov.pl -domain YOURDOMAIN.WHATEVER -password ZIMBRA_PASSWORD < /tmp/ldapinfo.txt > ldapinfo.zmp

#if you still need to route most users through another server until migration (as zimbra)
cat ldapinfo.zmp |perl -e 'while (<>) { chop;print ($_," zimbraMailTransport smtp:MAIL.YOURDOMAIN.WHATEVER:25\n"); }' > ldapinfo1.zmp zmprov < ldapinfo1.zmp

#increase the number of threads for lmtp, imap, http(s) etc (as zimbra) from http://wiki.zimbra.com/wiki/Performance_Tuning_Guidelines_for_Large_Deployments
zmprov ms `zmhostname` zimbraHttpNumThreads 500
zmprov ms `zmhostname` zimbraImapNumThreads 500
zmprov ms `zmhostname` zimbraLmtpNumThreads 50
zmprov ms `zmhostname` zimbraMessageCacheSize 10000 zmlocalconfig -e mailboxd_java_heap_size=9830 #20% of system ram - system ram = 48GB for this example zmlocalconfig -e zimbra_require_interprocess_security=0

#for users moving to Zimbra server that had other mail destinations
zmprov ma "YOURUSER@YOURDOMAIN.WHATEVER" zimbraMailHost ZIMBRA.YOURDOMAIN.WHATEVER zmprov ma "YOURUSER@YOURDOMAIN.WHATEVER" zimbraMailTransport lmtp:ZIMBRA.YOURDOMAIN.WHATEVER:7025

#added next 3 lines to /etc/sysctl.conf based on info from zimbra http://wiki.zimbra.com/wiki/Performance_Tuning_Guidelines_for_Large_Deployments
net.ipv4.tcp_fin_timeout=15 net.ipv4.tcp_tw_reuse=1 net.ipv4.tcp_tw_recycle=1
#also modified /opt/zimbra/conf/my.cnf after memory addition to server
innodb_buffer_pool_size innodb_max_dirty_pages_pct

#/opt/zimbra/mysql/bin/mysqlcheck errors:
mysql.general_log Error : You can't use locks with log tables. mysql.slow_log Error : You can't use locks with log tables.
fix with:
mv /cassens/zimbra/db/data/mysql/*_log.frm /tmp/ /etc/init.d/zimbra restart

#mount zimbra filesystem with "noatime" option

#web pages or external info:
http://wiki.zimbra.com/wiki/Split_Domain
http://wiki.zimbra.com/wiki/Mysql_Crash_Recovery
http://wiki.dovecot.org/Authentication/MasterUsers
http://wiki.zimbra.com/wiki/Zmprov_Examples
http://www.zimbra.com/docs/ne/latest/administration_guide/wwhelp/wwhimpl/js/html/wwhelp.htm#href=ZCS_Admin_Guide_7_NE.Managing_Resources.html
http://www.zimbra.com/docs/ne/latest/administration_guide/wwhelp/wwhimpl/js/html/wwhelp.htm#href=ZCS_Admin_Guide_7_NE.VMware_Zimbra_Collaboration_Server.html
http://wiki.zimbra.com/index.php
http://wiki.zimbra.com/wiki/Performance_Tuning_Guidelines_for_Large_Deployments
http://wiki.zimbra.com/wiki/Open_Source_Edition_Backup_Procedure
http://wiki.zimbra.com/wiki/Moving_ZCS_to_New_Server
http://wiki.zimbra.com/wiki/Guide_to_imapsync